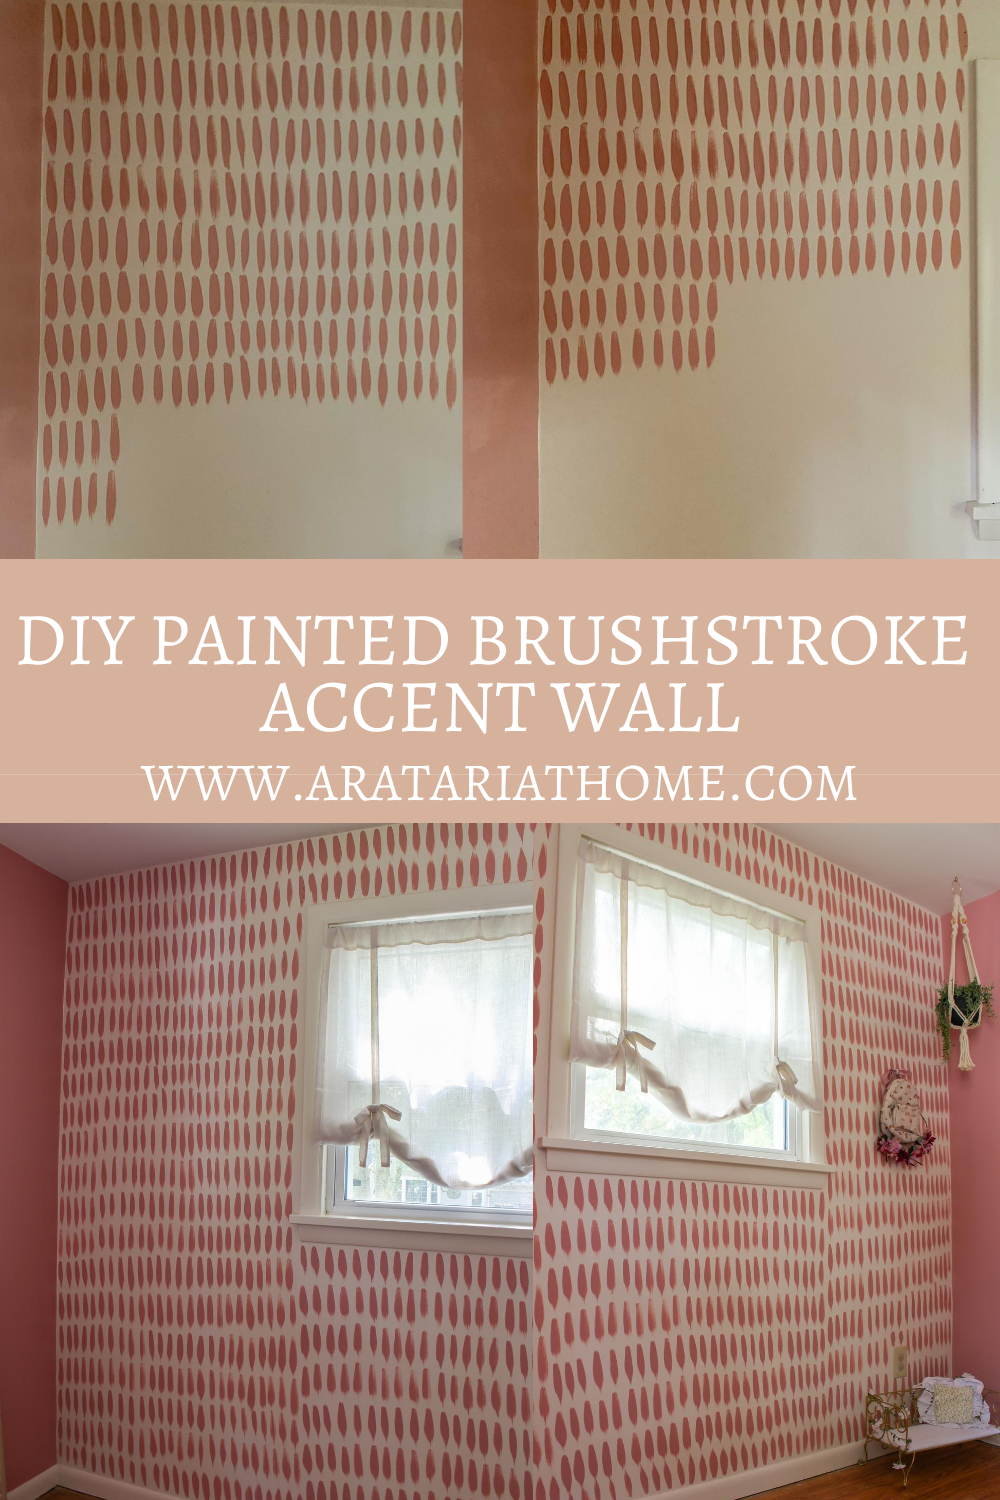
DIY Painted Brushstroke Accent Wall
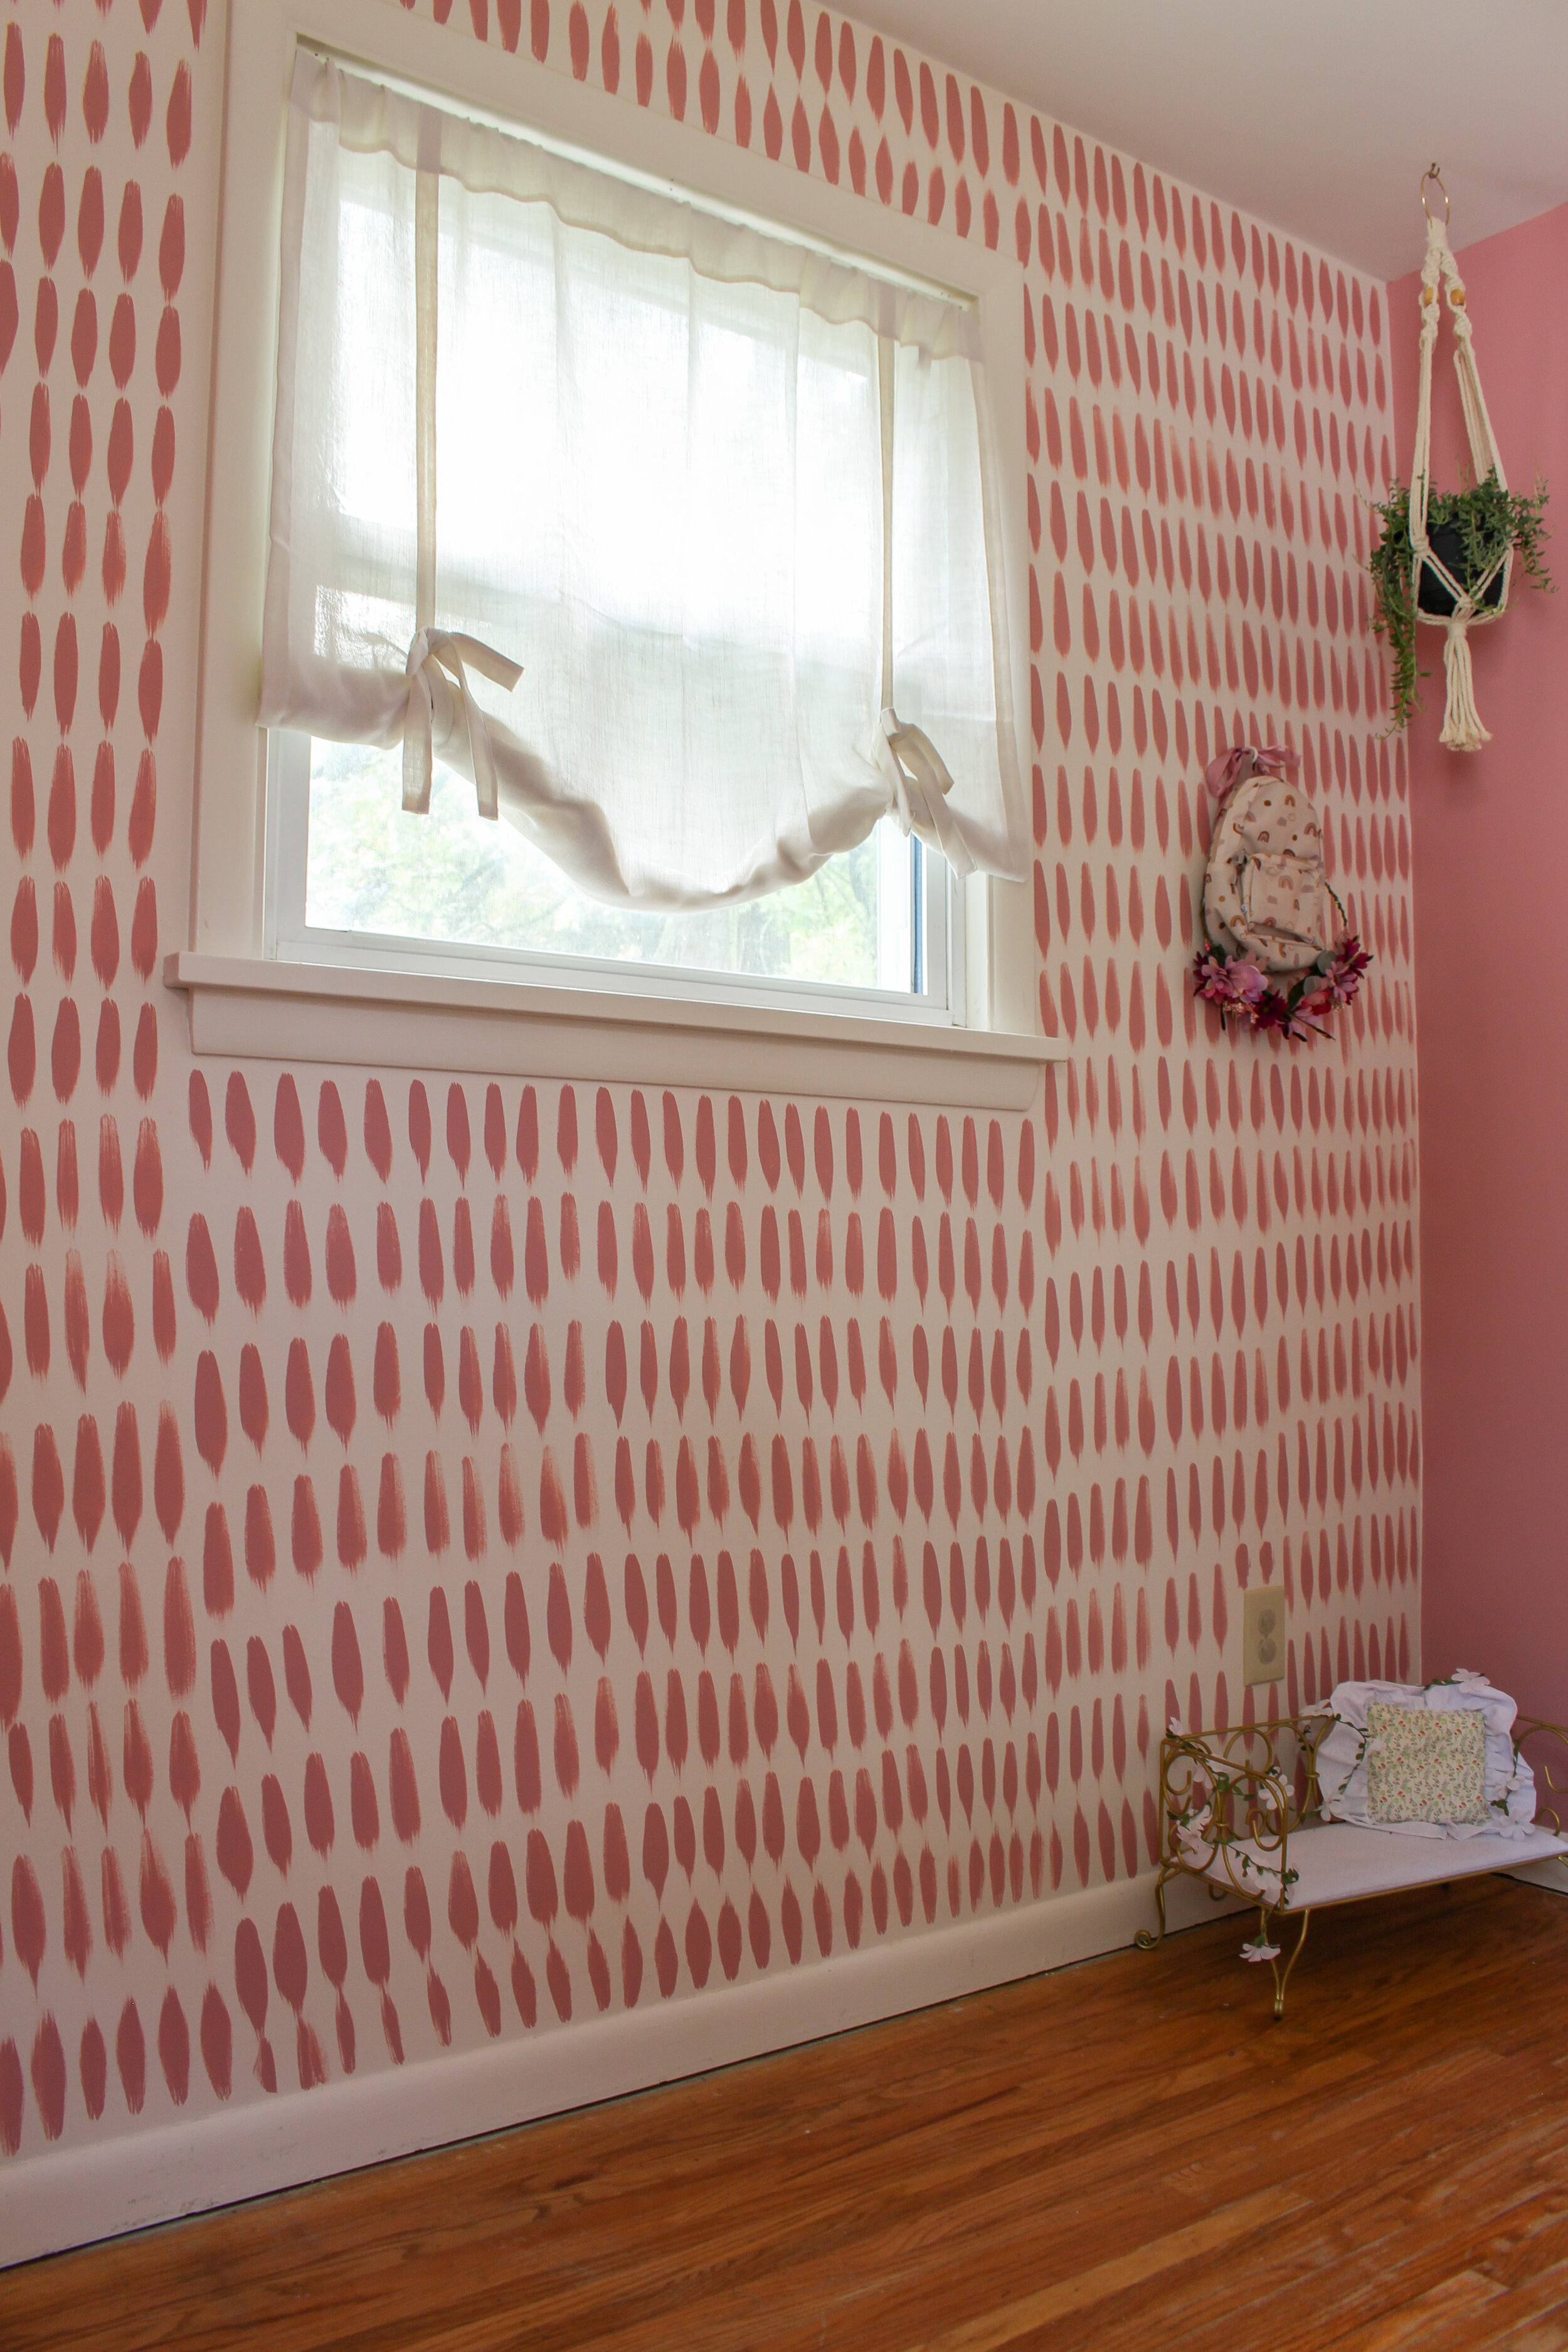
This DIY painted brushstroke accent wall in Gigi’s room came out so cute!
Another favorite DIY project is my stenciled floors from our last house, see it HERE.
I love how this DIY painted brushstroke accent wall came out and it was so easy to do!

This post contains affiliate links. If you click on these links and purchase something, I make a commission at no additional cost to you. This helps to support my blog, so thank you SO much!
I wanted to create a fun accent wall in Giulietta’s nursery. I also didn’t want to spend a lot of money so I challenged myself to create something unique using only paint and a brush!
I love how it turned out and I think it looks like wallpaper. The actual wall only took about 45 minutes to do so it’s a nice and quick DIY project.
I used Behr Rose Pottery for her room color and it’s GORGEOUS! It’s the perfect shade of mauve/blush/pale pink. It kind of changes shades with the lighting. It’s not too bright and not too pale.
SUPPLIES:
1 gallon of paint ( I used Behr Rose Pottery )
Angled 2” paint brush
DIRECTIONS:
Prep your walls by ensuring they are clean and dust free
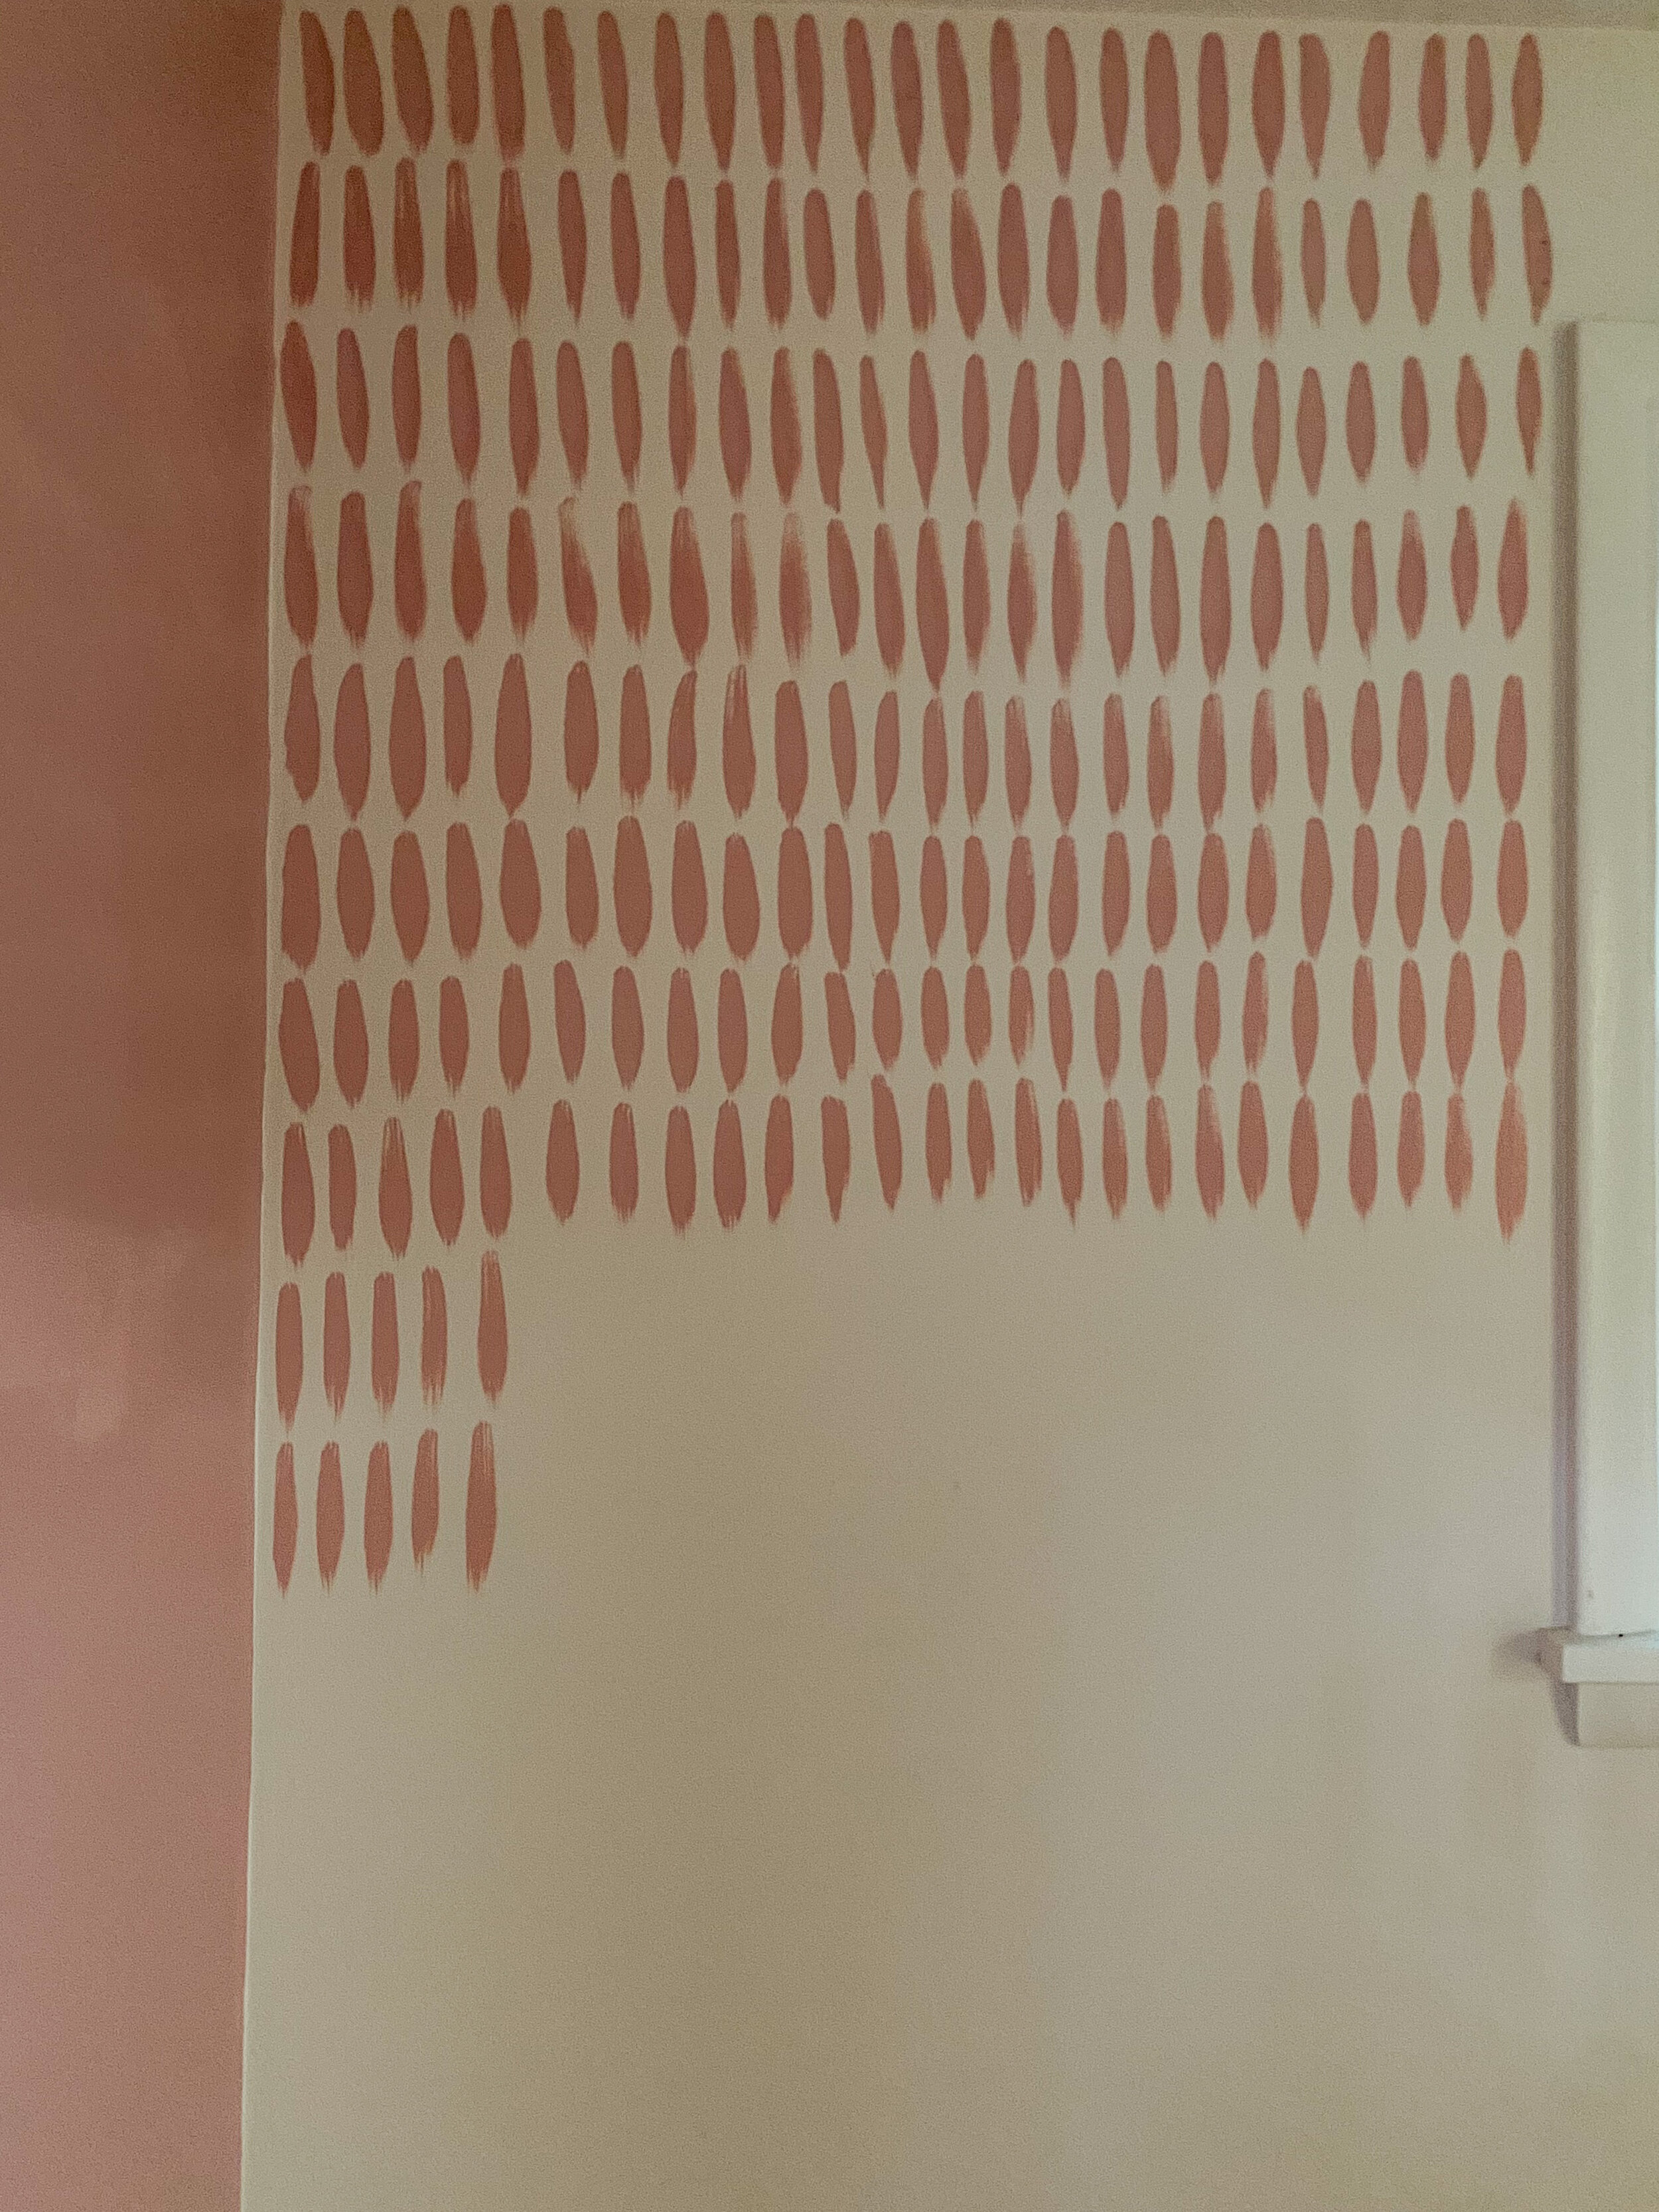
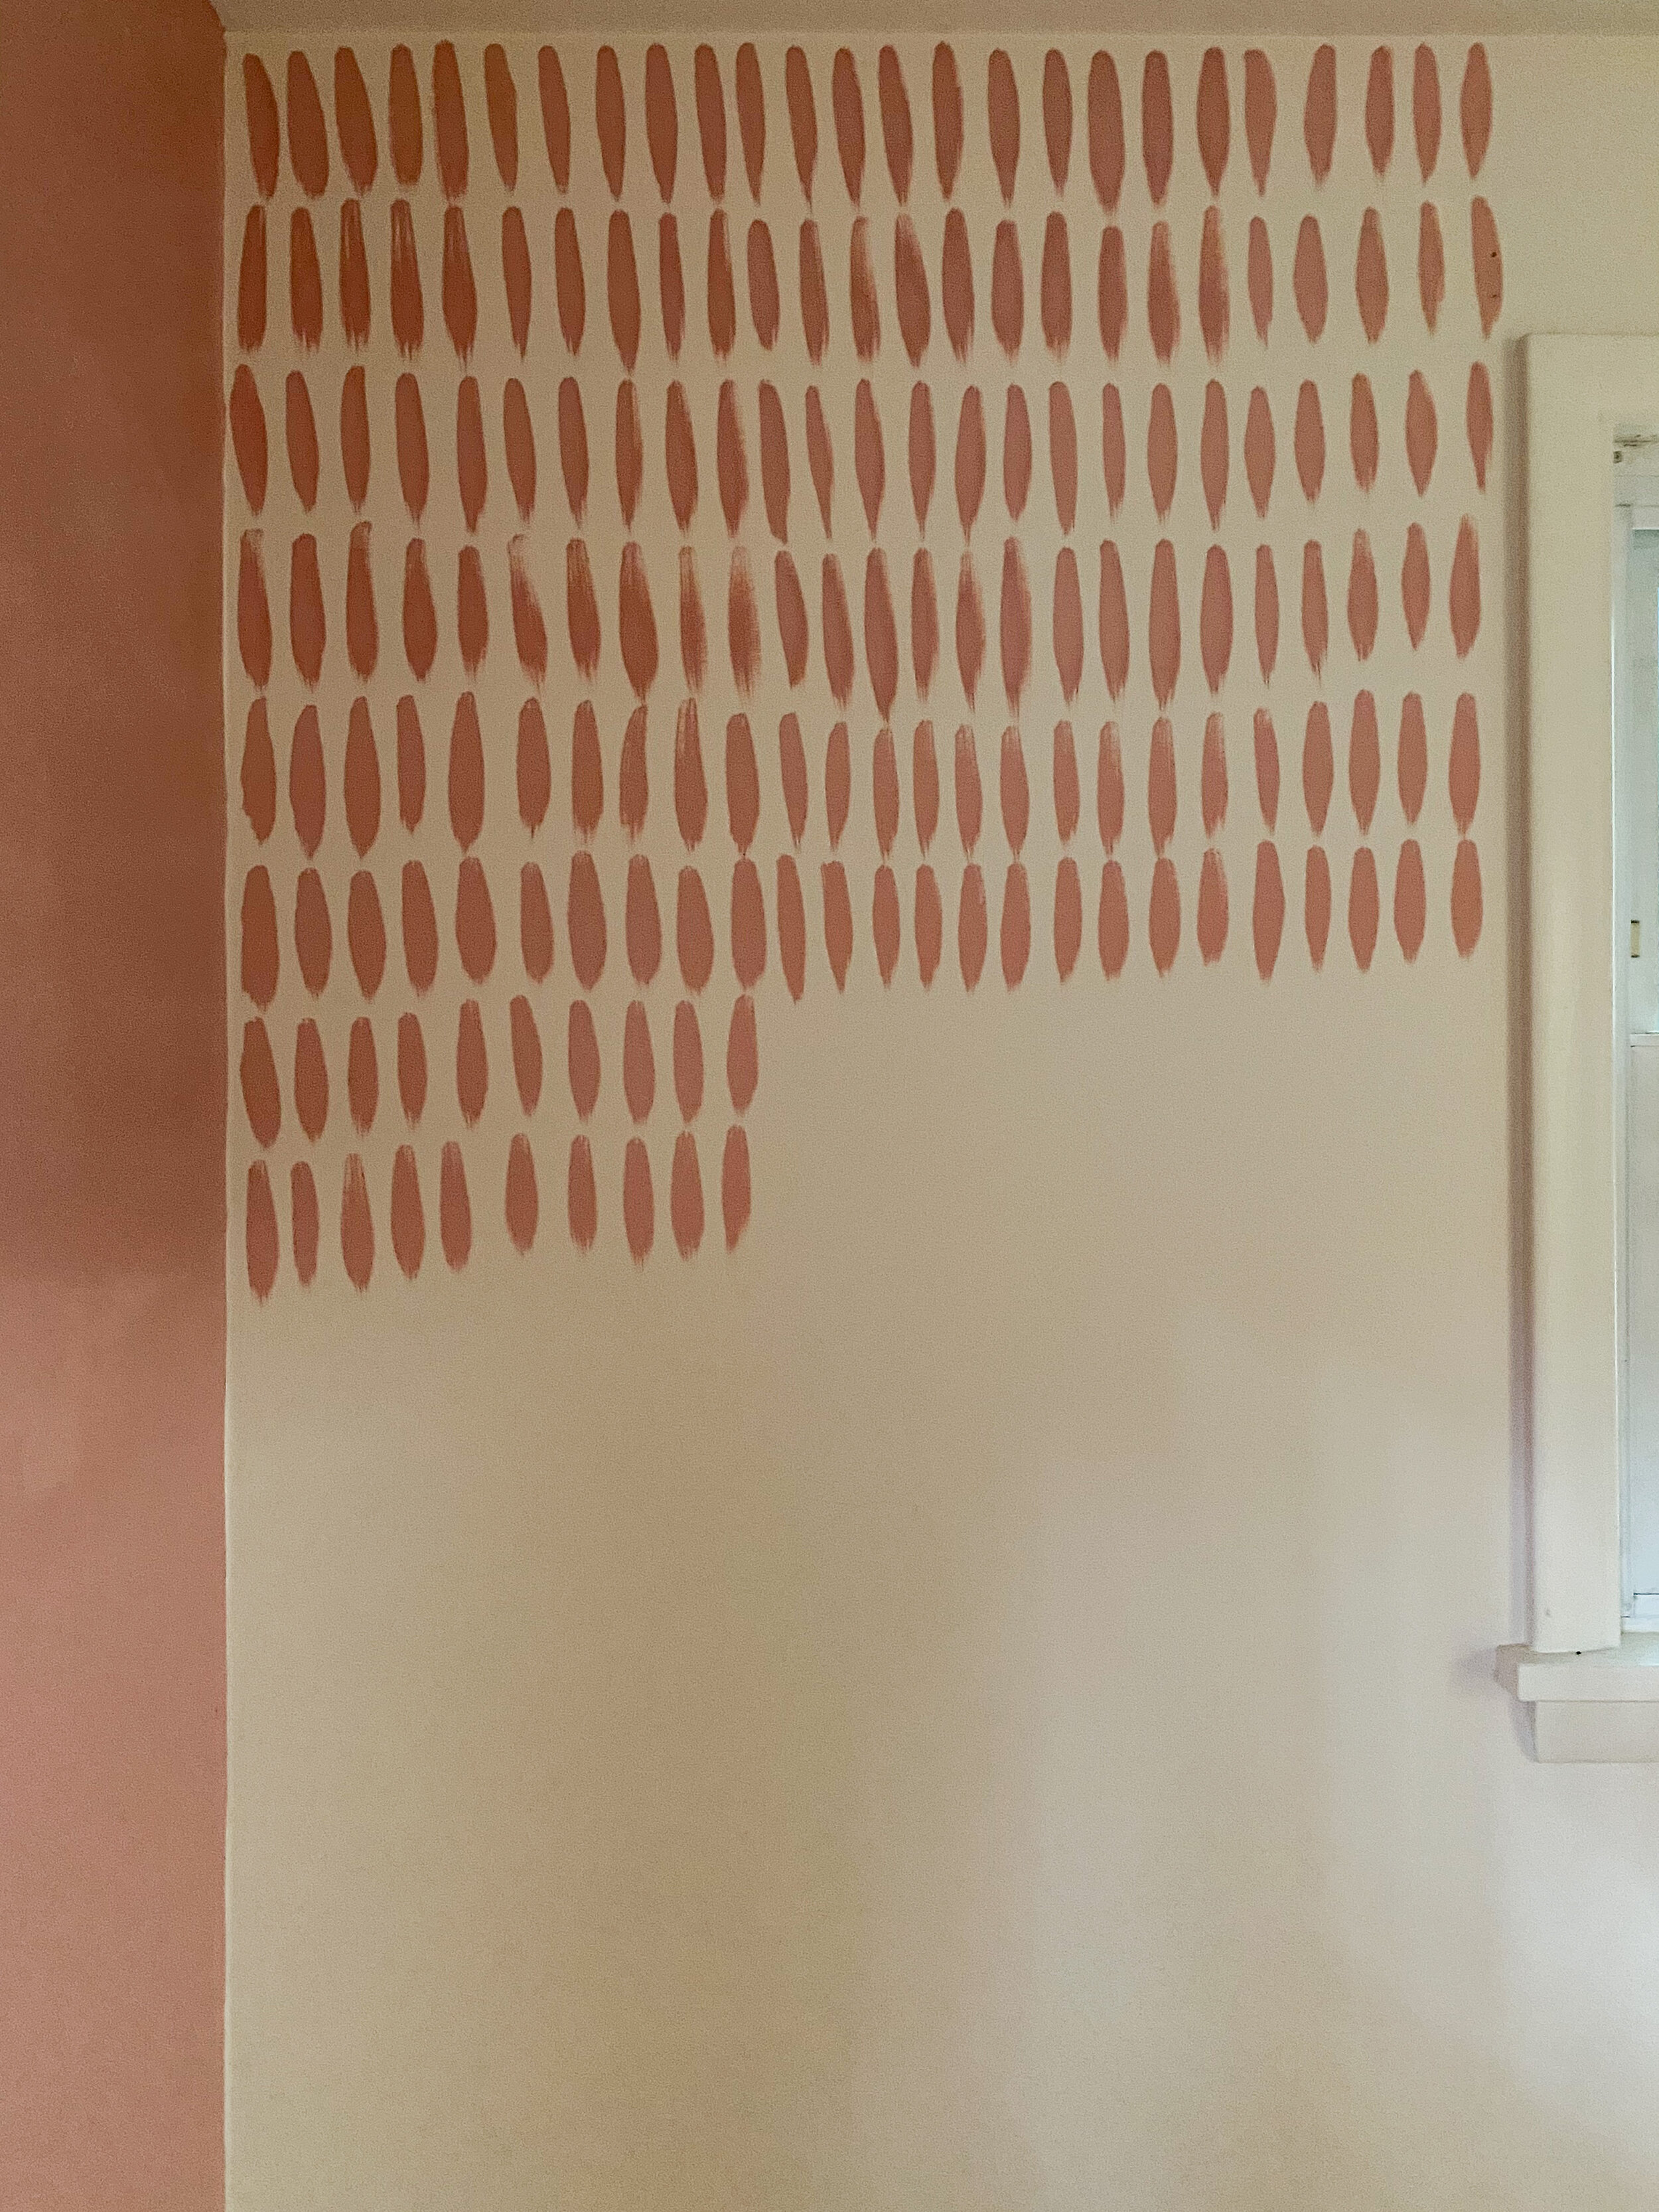
Paint the wall behind the brush strokes the color that you want (the walls were already white so I just left them as is, but just cleaned the wall really well)
Dip the end of the paint brush into the paint and make sure it’s not dripping off the brush
Holding the paint brush vertically, draw lines onto the desired wall
My trick is to do 10 strokes at a time before dipping back into the paint. This gave me the look I wanted of appearing brushed onto the wall. You can dip the brush back into the paint whenever, depending on if you like the more brushed look or the more full line look
I would paint 5 strokes across horizontally, then do 5 more strokes underneath the first ones, lining them up as best as I could
The point is that it’s hand painted so it doesn’t have to be perfect which is why I didn’t measure
Continue the next 10 strokes until the wall is complete
DIY TIPS:
Practice first, either on a piece of paper or cardboard or another wall
I practiced on the walls that I was painting with Rose Pottery and then just painted over it
Try to do it all at once if possible so that your strokes don’t vary too much
Applying different pressures with your hand will give you a different look so that’s why I practiced a bit before hand to see what I liked best
A more heavy hand will give your strokes a fuller/thick look; a more lighter hand will give your strokes a more brushed on look
You may have to get creative around the outlets, windows, doors, floors, ceiling, etc. I tried my best to make it look cohesive by making the brushstrokes smaller or longer depending on what the area needed.
This was such an easy project. It looks a lot harder than it was. It's also super fast to do. Once I got going, it went really quick. It’s nice too because you don’t need to cut in which saves a lot of time.
SHOP THE DIY BRUSHSTROKE WALL AND SUPPLIES:

Be sure to sign up for our free newsletter to stay up to date with what is going on over here :)
Upon signing up, you will receive 3 gallery wall printables, 5 on the go Mom hacks, and gain access to our FB group! Scroll to the bottom of the page to join! We’d love to have you as part of our community!
Thank you for stopping by the blog!
XO
-LA
SAVE THIS POST FOR LATER, PIN IT NOW: