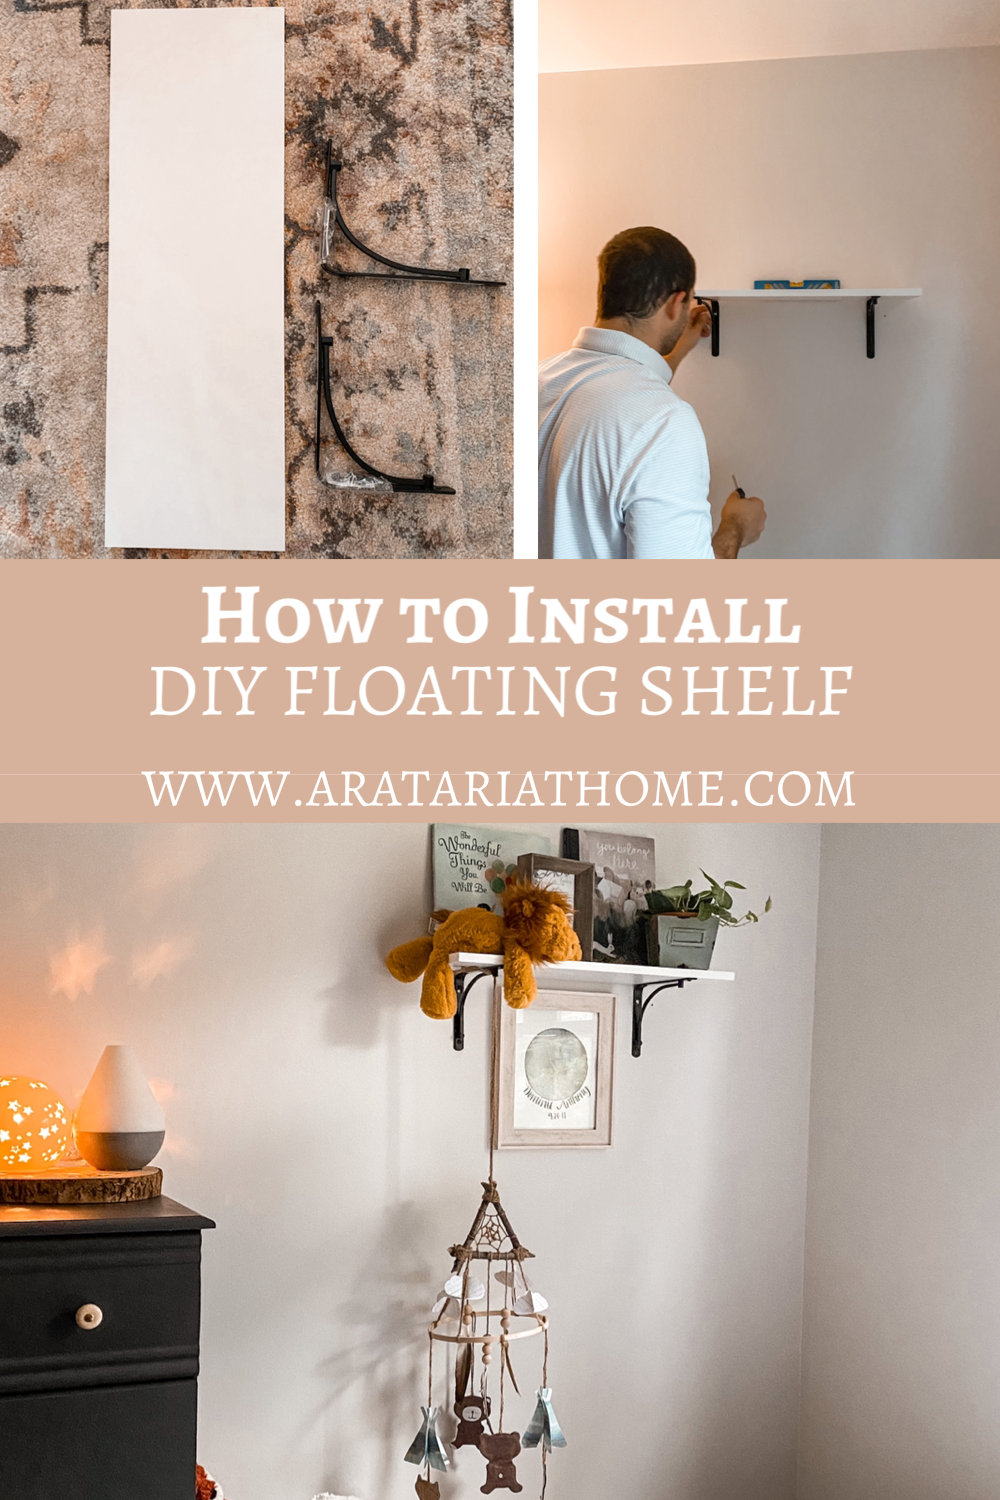
How to Install a DIY Floating Shelf
We made this DIY floating shelf and it was so easy to install!
See Dominic’s room HERE.
By following these steps, you can easily install a DIY floating shelf in your home too!
This post contains affiliate links. If you click on these links and purchase something, I make a commission at no additional cost to you. This helps to support my blog, so thank you SO much!
I had been wanting a floating shelf for Dominic’s room and the ones I was loving were kind of pricey so I figured we could easily make one ourselves for a lot less.
Since moving into the new house, we have been taking lots of trips to Home Depot for all the things! I found these shelf supplies and knew we could quickly whip one up and make it exactly how we wanted!

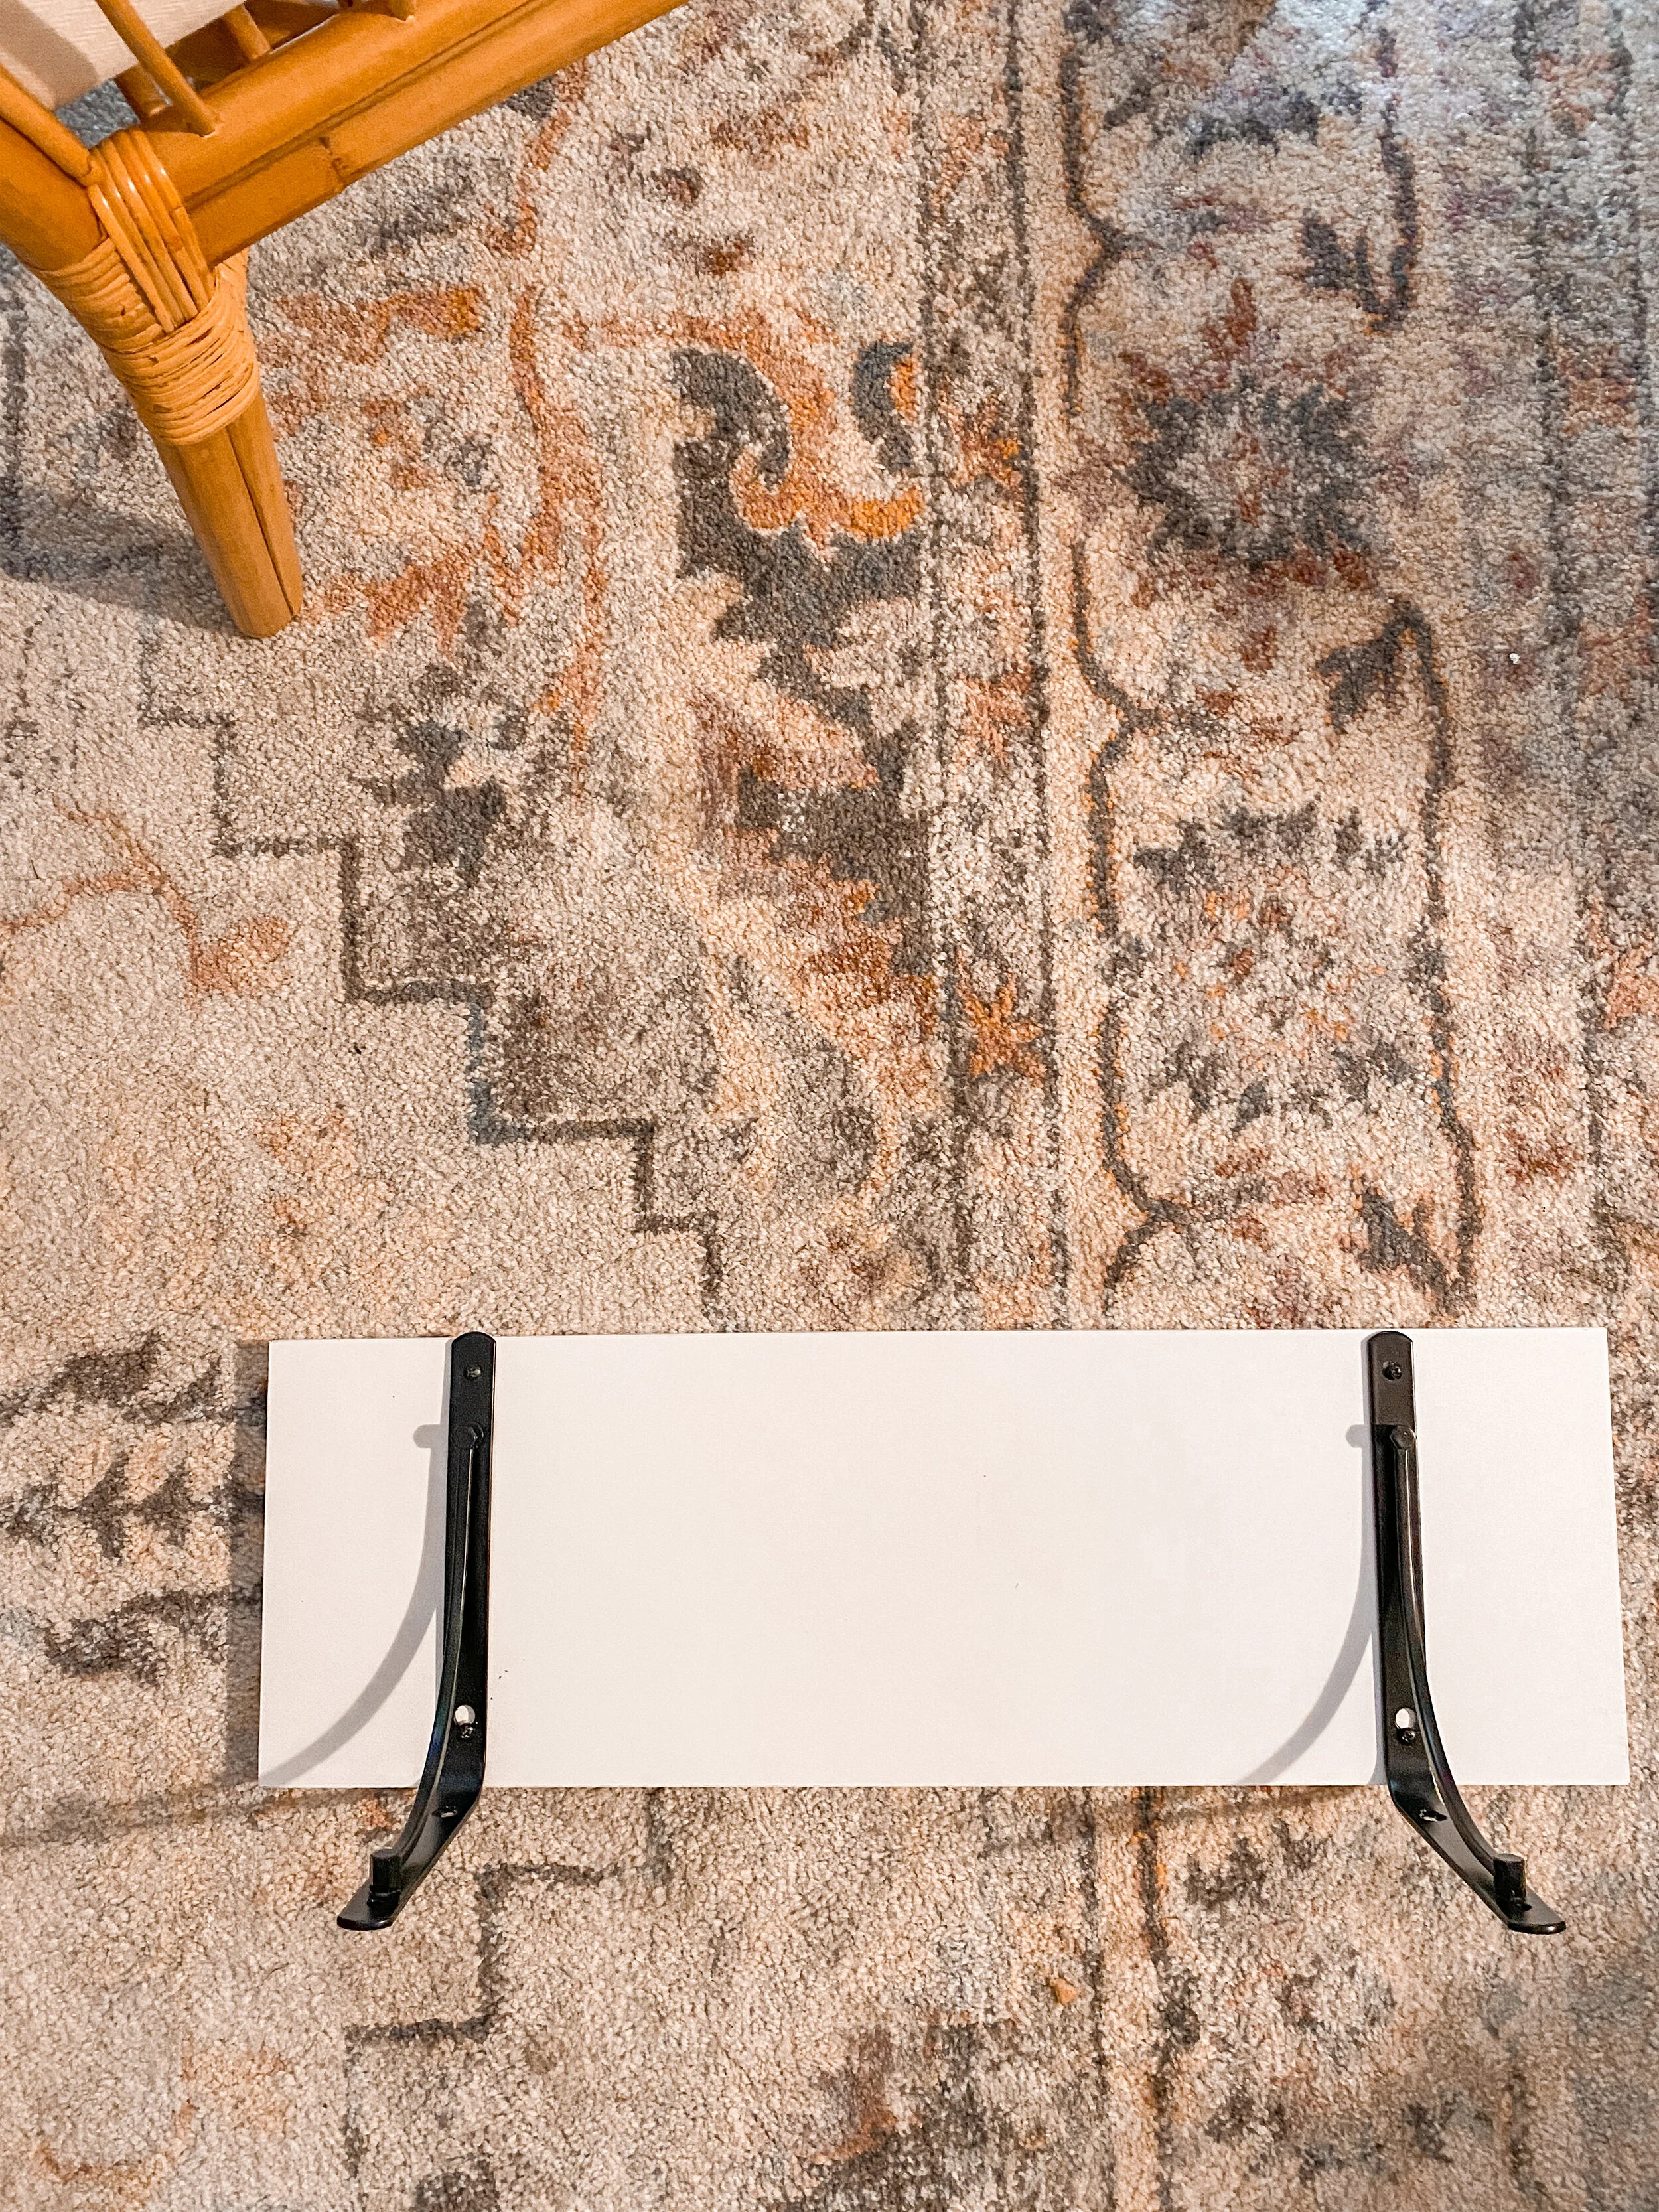
DIY FLOATING SHELF SUPPLIES:
Shelf in dimension of choice ( we did an 8” x 24” )
Brackets ( be sure to get ones that fit the width of your shelf )
Also, lots of brackets include the mounting screws
Drill
Screw driver
Level
DIY FLOATING SHELF DIRECTIONS:
Attach the brackets to the shelf board using the smaller screws
Measure to be sure they are equally distant from the edges
We used a drill to make it go faster
Measure where you would like the shelf to go on the wall and use a level to ensure it’s straight
Use a pencil to mark holes
Using the drill, drill pilot holes for the screws
Attach the shelf to the wall using the long screws
We used the drill to start and finished with a small screwdriver since it was tight with the drill
Decorate the shelf!

STYLING A DIY FLOATING SHELF
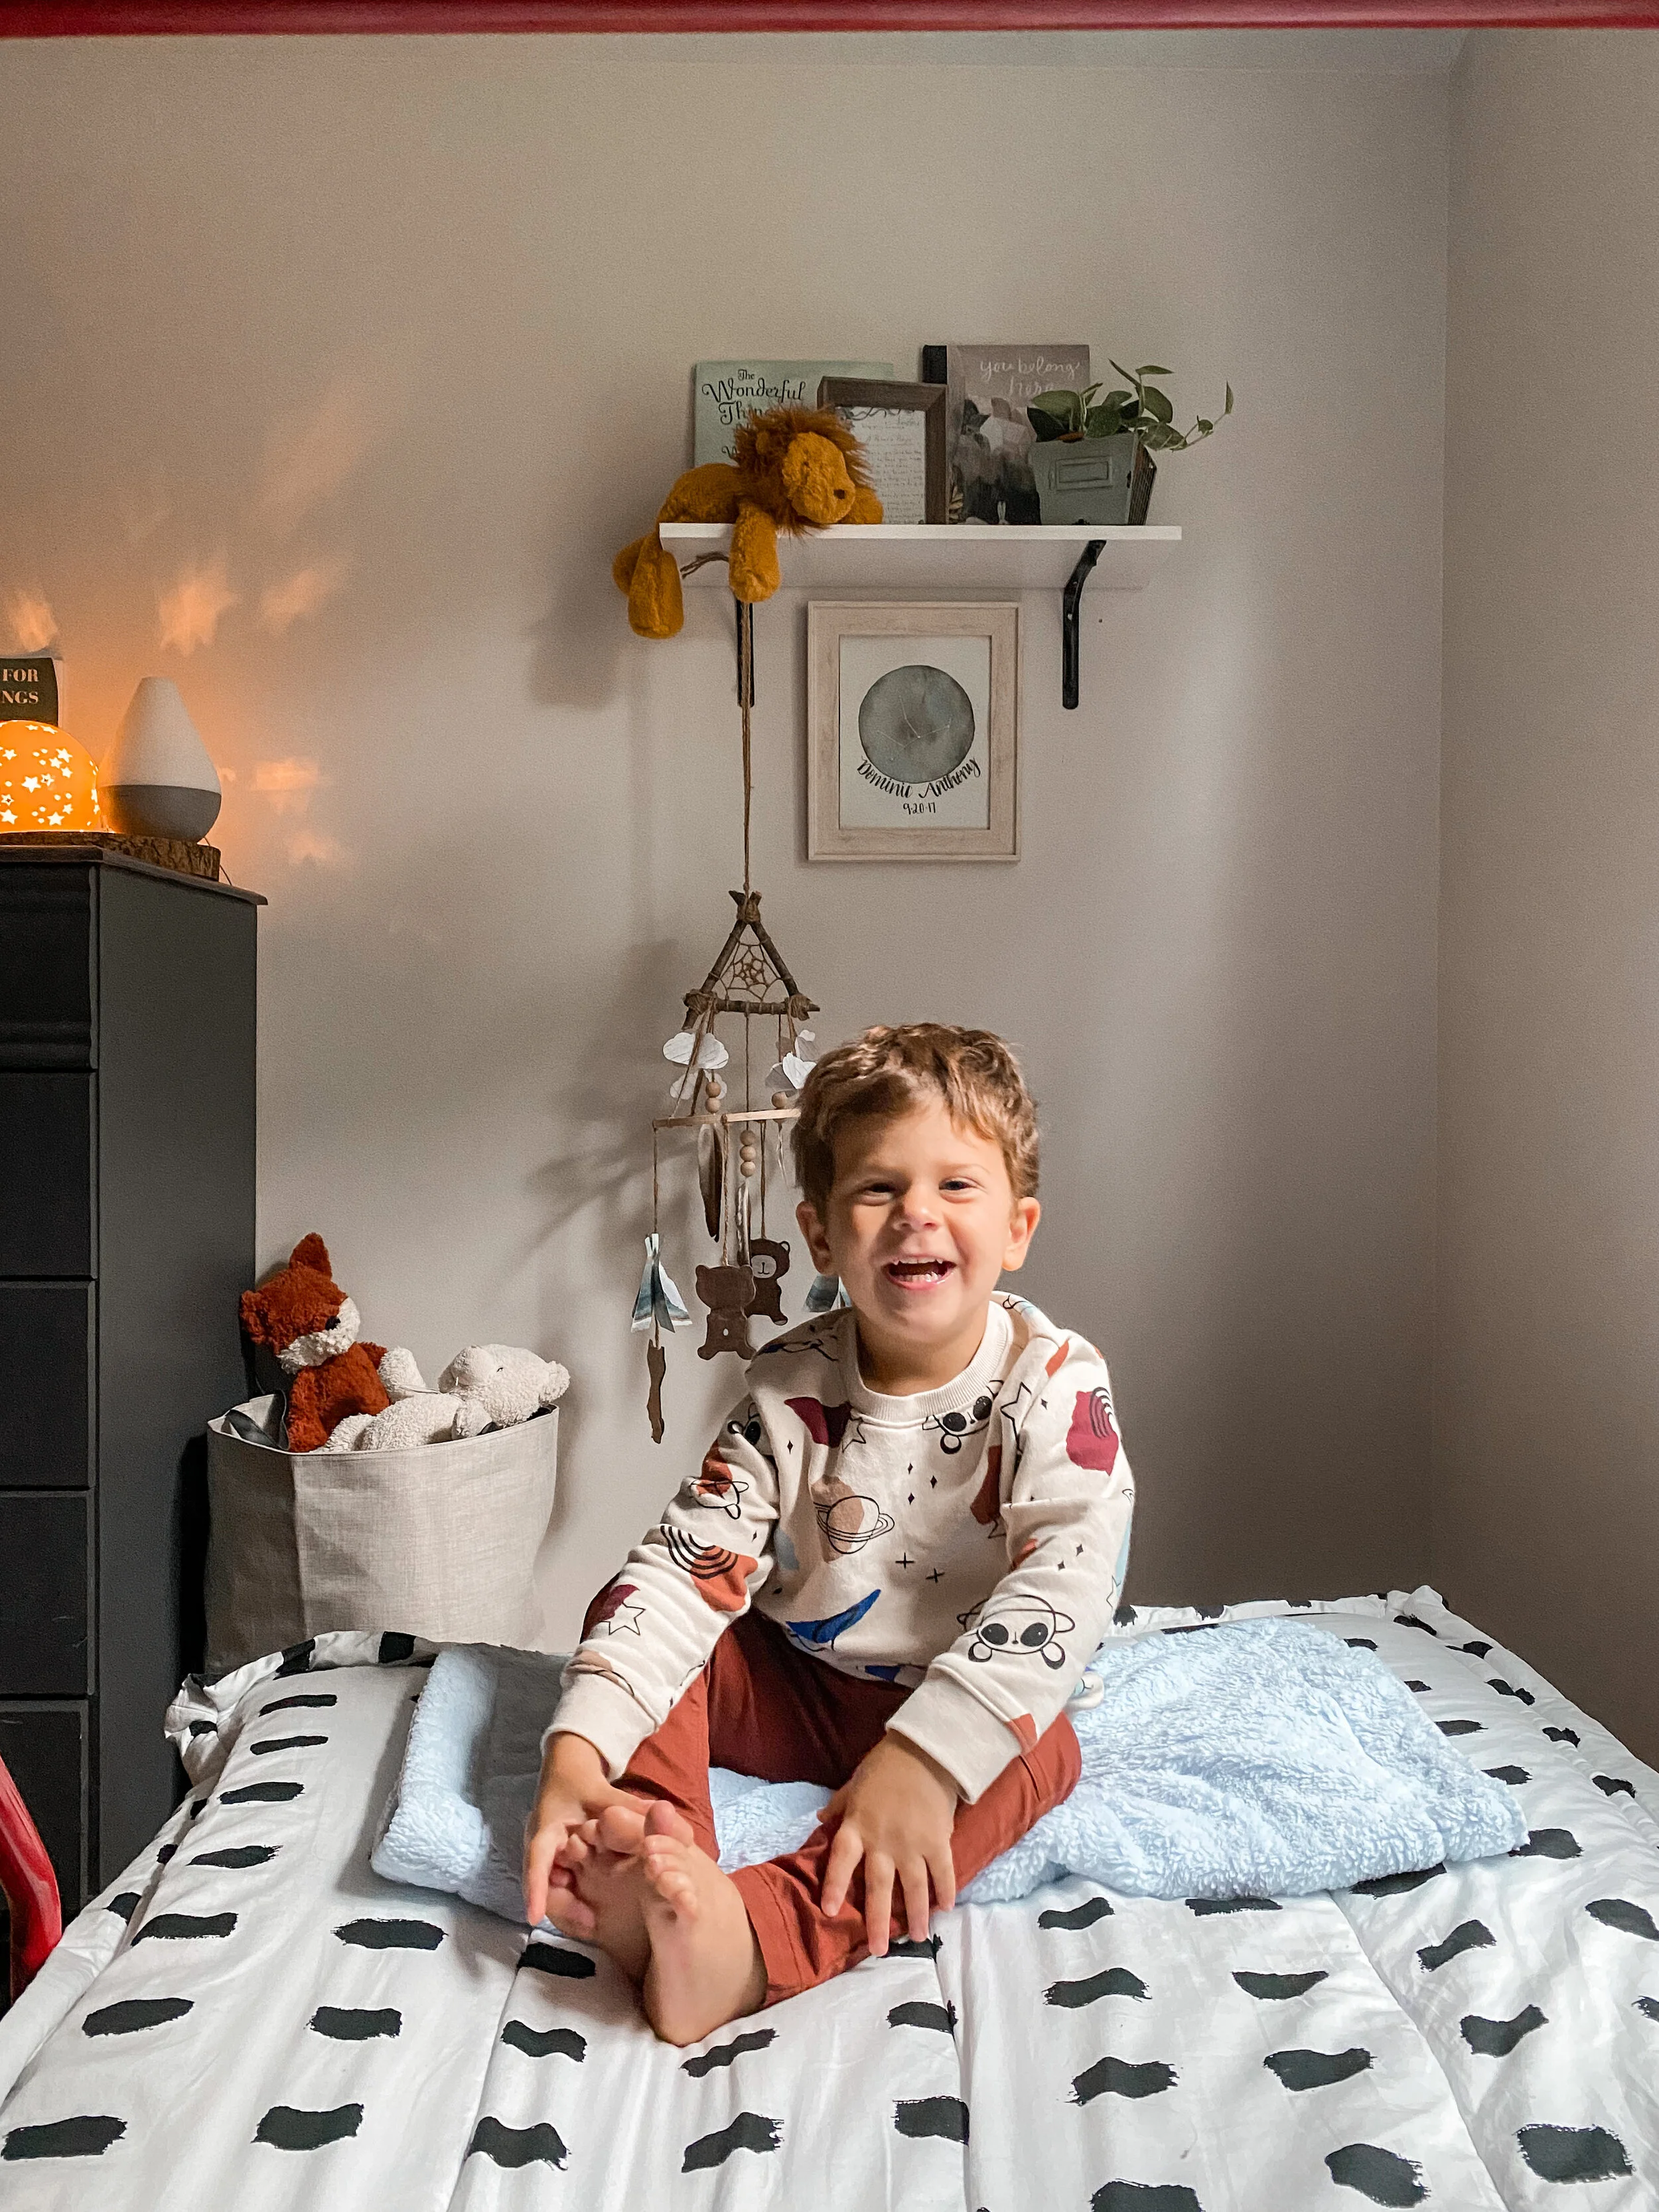
This floating shelf was so fun to put up and style. I’m sure it will change a lot, but for now I put up some of our favorite books. Books that are beautiful pieces of art and are special to us.
I also put a little silver pothos on the shelf in hopes that it will trail down the wall.
Dominic wanted to put his stuffed lion on the shelf, so we did!
From the bracket, I hung his mobile that my sister had made for him when he was born. It’s so nostalgic that I had to find a special place for it.
Under the shelf, I hung the constellation drawing from the night Dominic was born.
I styled the shelf with all things that are special to us. Maybe not the plant, but I love plants and I think each room should have plants sooooo there’s a plant!
This floating shelf was so fun to put up and I think it’s perfect for this wall in Dominic’s room. It was a big bare wall and this shelf is perfect for taking up some space. I also love that it cleared up some space on his dresser.
This was a simple DIY and cost us just a little over $20 for all the supplies (not counting the tools that we already had). I’m so glad we made this for his room!
SHOP THE DIY FLOATING SHELF SUPPLIES AND DECOR:

Be sure to sign up for our free newsletter to stay up to date with what is going on over here :)
Upon signing up, you will receive 3 gallery wall printables, 5 on the go Mom hacks, and gain access to our FB group! Scroll to the bottom of the page to join! We’d love to have you as part of our community!
Thank you for stopping by the blog!
XO
-LA
SAVE THIS POST FOR LATER, PIN IT NOW: