DIY Patriotic Tie Dye Clothing
I had so much fun making these DIY patriotic tie dye clothing for the kiddos!
Looking for some more 4th of July inspo? Check out my front porch a couple years ago, HERE.
These DIY tie dye clothes are so easy to make for 4th of July and now I want to dye more things!
*This post contains affiliate links. If you click on these links and purchase something, I make a commission at no additional cost to you. This helps to support my blog, so thank you SO much!*

I decided to try my hand at tie dye and it was so easy! I was a bit intimidated, but it really is super simple!
I wanted to make some shirts for the kiddos for the 4th of July! I decided to do some tie dye shirts for them using RIT dye.
After researching a bit and looking on the RIT website, I hopped right in to making their shirts. I’ll share exactly what I did below!

SUPPLIES:
Clothing of choice: I did a tee shirt for Dominic and a bodysuit for Giulietta
Large buckets
Hot water
Stirring object such as a spoon or tongs (something you don’t mind getting dye on)
Paper towels
Rubber Bands
RIT Dye: I used Denim Blue and Scarlet
Gloves


DIRECTIONS:
Fill buckets with hot water
Add desired amount of dye to the water
The RIT website has exact measurements, but I just added a little to start and tested the color by dipping a paper towel into the water
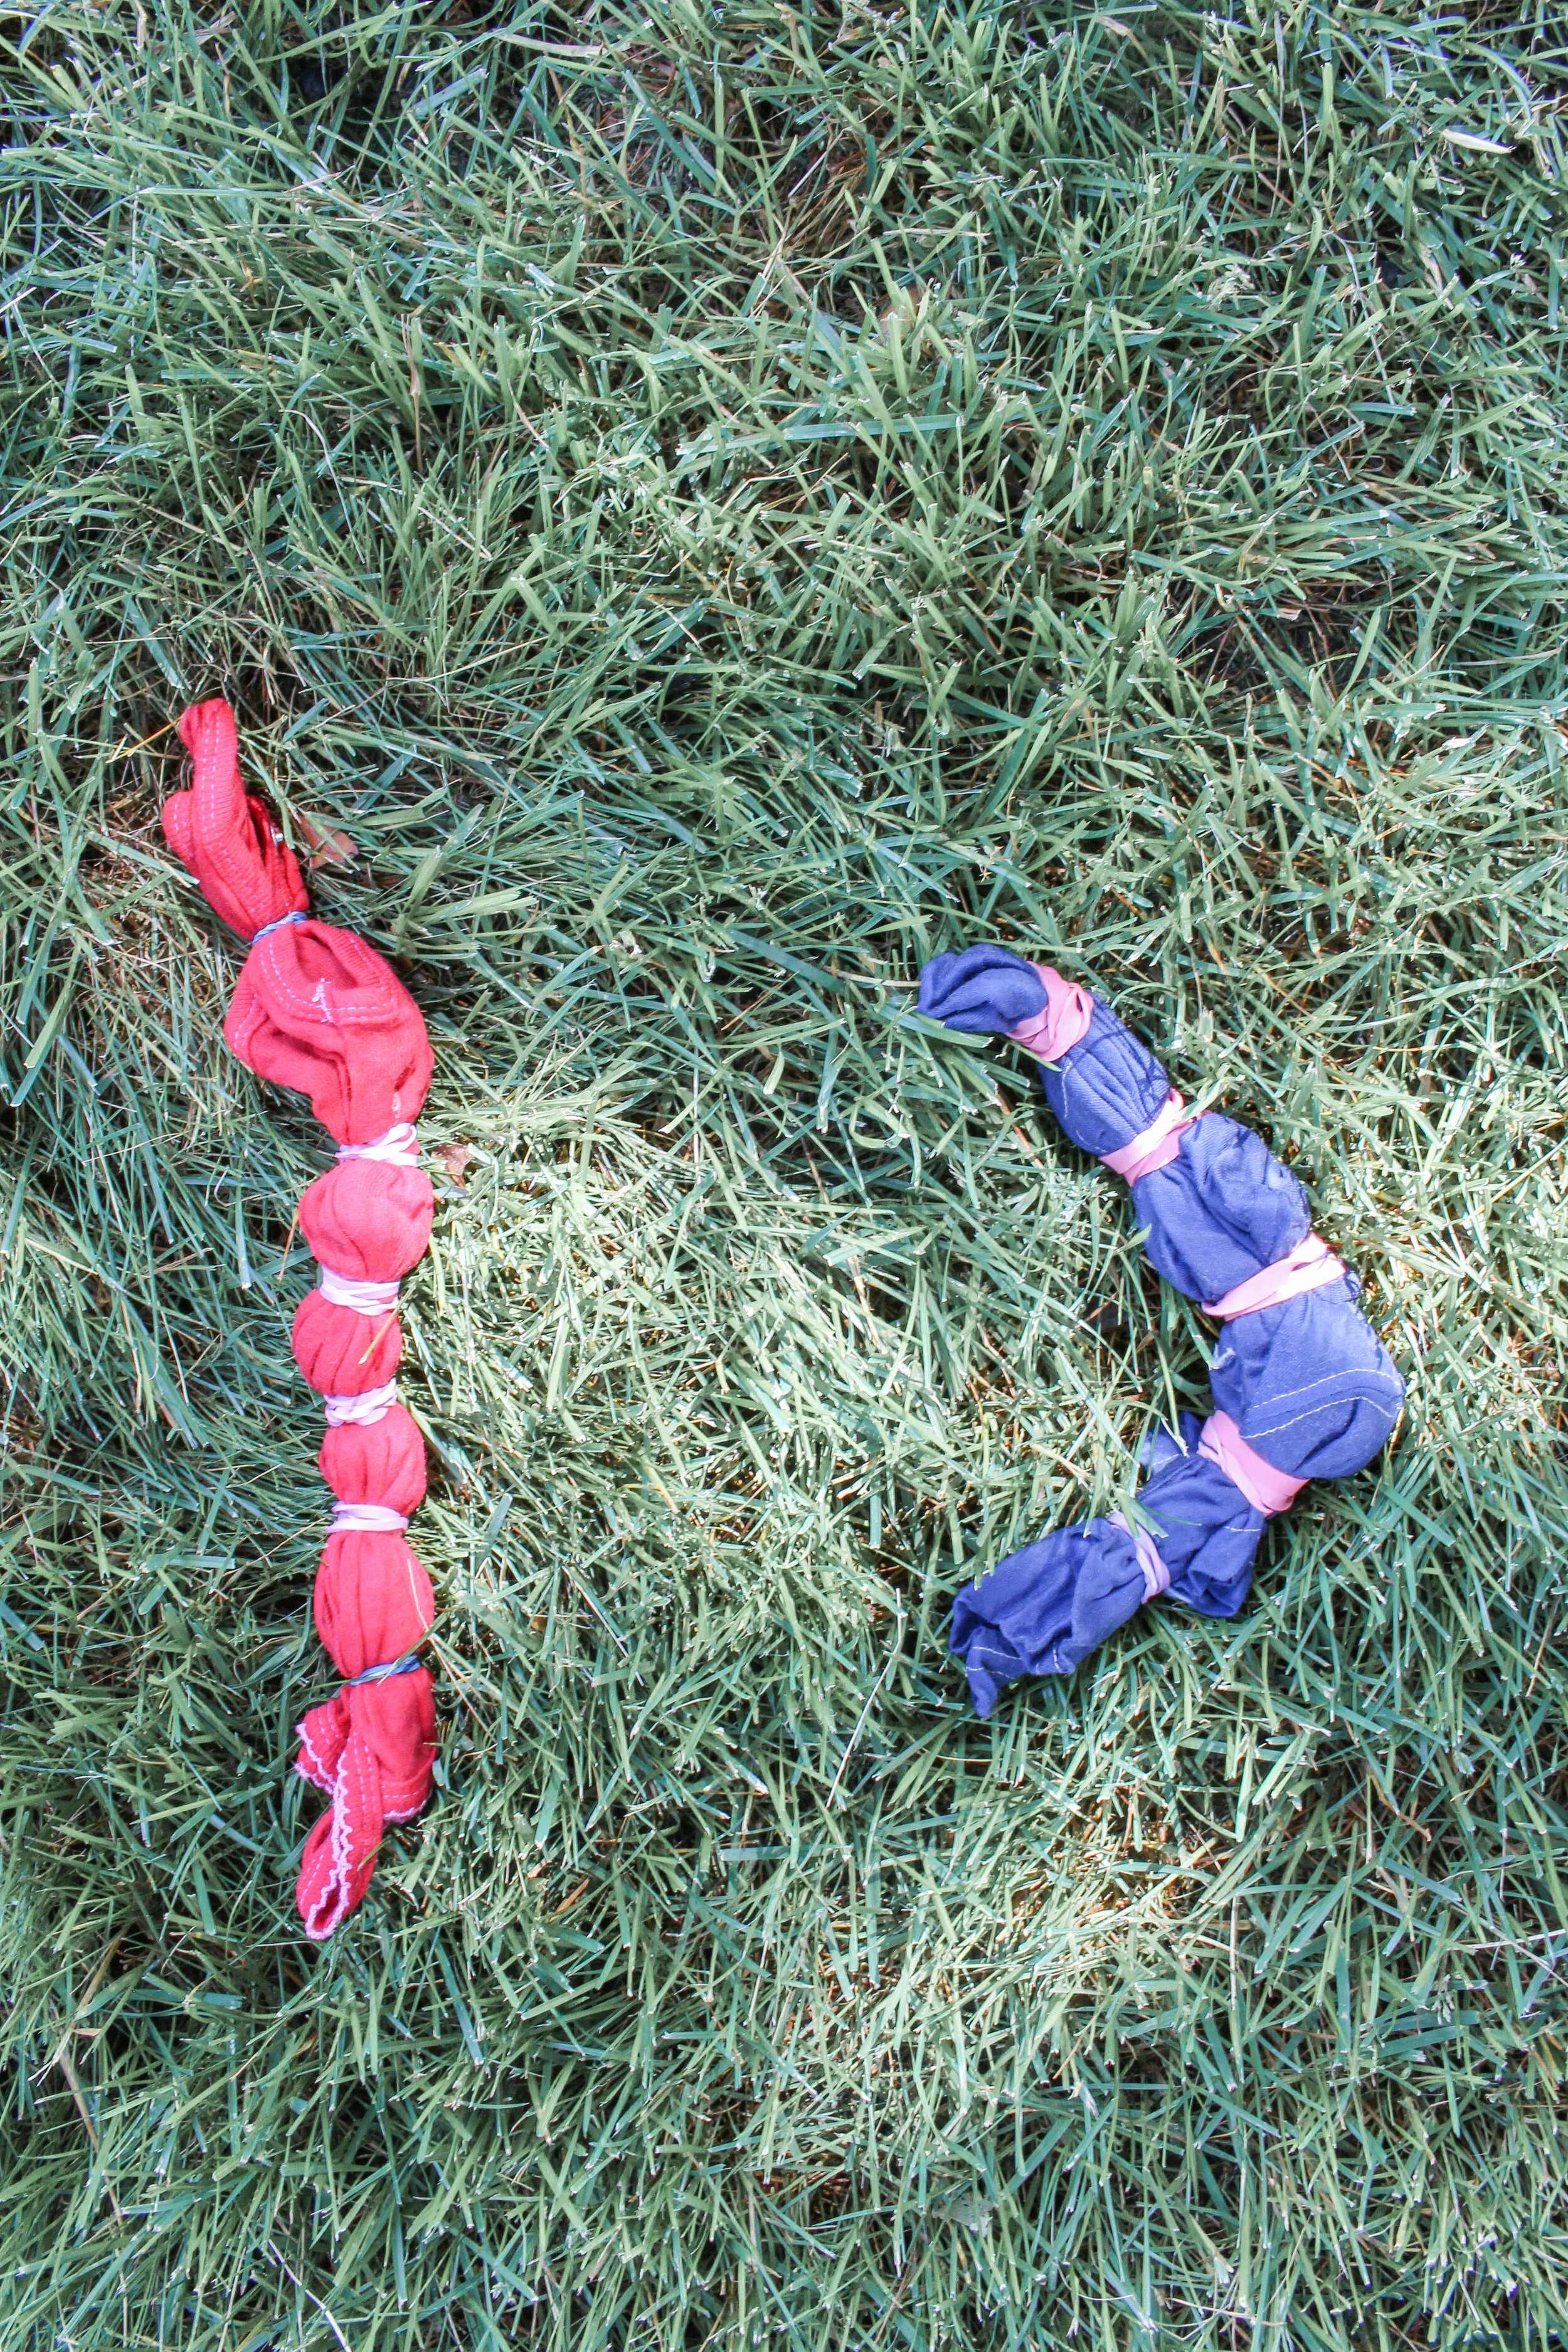
Add rubber bands to the clothing in whatever design you like!
For Dominic’s circles, I grabbed the middle and added a rubber band and then added rubber bands on top and on bottom
For Giulietta’s stripes, I just added rubber bands going down the bodysuit
There is kind of no rhyme or reason, if you just want it to be random
Just make sure the rubber bands are secure and tight so that they create the white parts on the clothing
Place clothes into the dye while wearing gloves
Keep in the dye for as long as you want—I did about 10 minutes
The longer you keep the clothes in the dye, the darker the color
I kept stirring the clothes and checking on them every few minutes to see the color
Remove the clothes from the dye baths and rinse off—since we did this outside, I used the hose
Rinse until the water runs clear
Remove rubber bands to reveal your design!
Wash in the washing machine then dry in the dryer
I added an old towel with the clothes to catch any color coming off
DONE!
Note: mine did fade a bit because I did not use the RIT dye fixative, but I don’t mind at all! I wanted a more muted color anyways so I love how they turned out
Now, I want to dye all the things! I want to do some neutral dyeing next, I think! It’s so fun playing around and seeing your finished product. It’s a quick DIY that is completely different each time which makes it even more fun!
SHOP THE DIY:

Be sure to sign up for our free newsletter to stay up to date with what is going on over here :)
Upon signing up, you will receive 3 gallery wall printables, 5 on the go Mom hacks, and gain access to our FB group! Scroll to the bottom of the page to join! We’d love to have you as part of our community!
Thank you for stopping by the blog!
XO
-LA
SAVE THIS POST FOR LATER, PIN IT NOW: