Concrete Countertops
Thank you to Z Counterform for supplying the products to build our concrete countertops. All opinions and thoughts are my own.
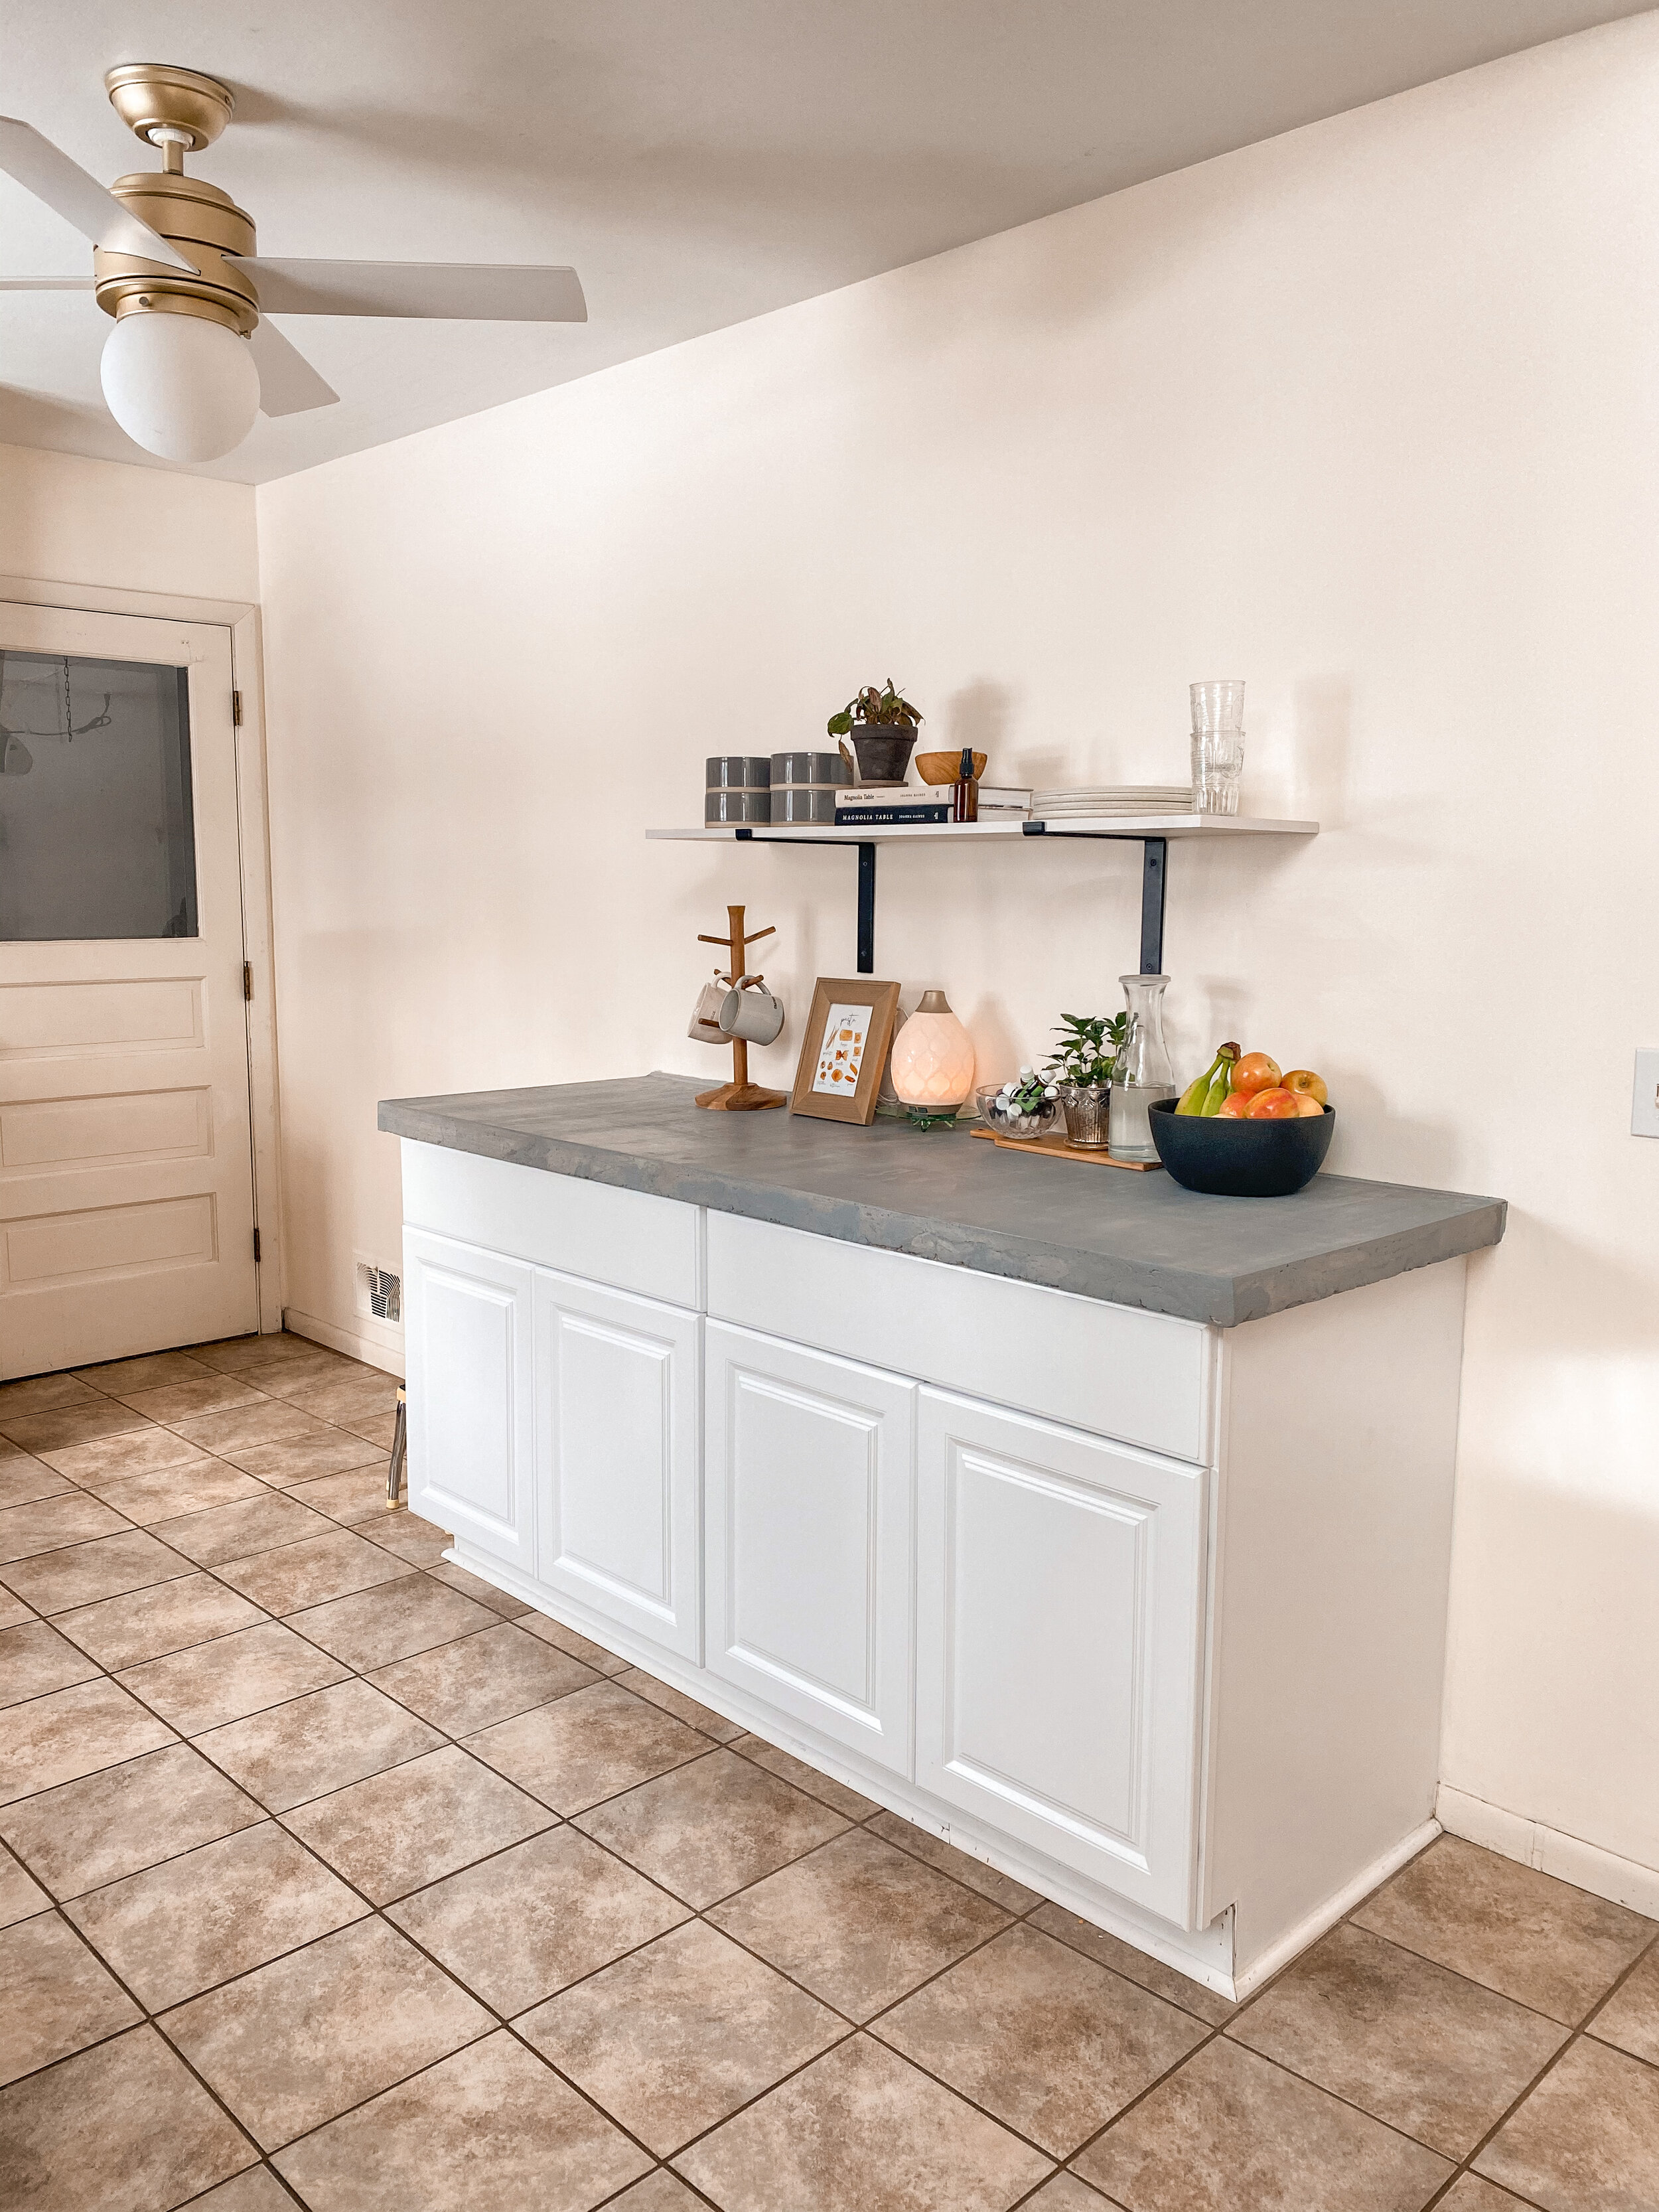
We decided to add some concrete countertops to our kitchen to give it a more natural and organic feel.
See our full plan for the kitchen makeover HERE.
Concrete countertops add so much character to a space and I love the organic feel they add.
This post contains affiliate links. If you click on these links and purchase something, I make a commission at no additional cost to you. This helps to support my blog, so thank you SO much!
I’m so excited to reveal our concrete countertops with you today! This has been my plan since for the kitchen when we first looked at this house last May so it’s very exciting this is done and exactly how I envisioned!
Let me start by saying why we decided to add these concrete counters. Our kitchen is about 300 sq ft, but we have very little counter space. We wanted to live with the kitchen for a bit and see how it functioned to see what we would want for additional prep space. After being here only a couple weeks, we realized we really wanted more countertop and storage space.
We had a list of other projects to do before the counters as the kitchen was functional so it took a few months before we were able to start the kitchen project. First we got these cabinets from Home Depot which automatically increased our storage space. Just having these cabinets gave us tons of storage for appliances that were kind of stored all over the house. We knew we wanted to have the counters done ASAP.
We used Z Counterforms for the countertops and really enjoyed this product. We decided to hire a contractor to install the counters as we don’t have much experience with concrete and wanted to ensure they were done properly since we wanted them to function really well for us.
Our contractor did tell us he loved working with Z Counterform products. He has done concrete work in the past and he thought the system was really well designed. He said the molds were nice as they were easy to remove since they are plastic.


HOW TO INSTALL CONCRETE COUNTERTOPS:
Install Durock on the cabinets to create a surface for the concrete to sit on
Add the molding, mesh reinforcements, and Z clips
Mix the concrete and pour into the molds
Trowel to make it all even and level
Babysit and trowel every so often as it dries and water evaporates
Allow to dry completely (we did about 48 hours)
Remove the moldings by snapping them off and sand to make it smooth
Seal
This is a very condensed version of what we did. Check out the videos on the Z Counterform website for more information on how to exactly do these countertops. They have a variety of colors to choose from. We went with the natural concrete because I wanted to keep it as organic as possible.

Our contractor ended up putting a bead of gray caulk at the back of the wall so that it was flush and looked finished. If he didn’t do that, it would have been uneven as you couldn’t remove the back molding since it was flush with the wall. This would be a non issue if you were doing an island as you would be able to remove all the moldings.
The concrete countertops did crack while they were drying which was an unfortunate part of the process. Concrete does crack while drying for a variety of reasons. We think ours cracked because the weather was ‘warm’ for winter and then got rapidly cold as it was drying. This can impact the drying process as parts will dry faster than others causing it to crack before it’s fully dried. Luckily ours is just a surface crack and didn’t go all the way through. Our contractor did patch it and sand it again to give it some extra strength. We also stained it to ensure everything matched. You can still see the crack, but it really doesn’t bother me! it adds to the character I think. It also cannot be felt as it’s not uneven or anything. It doesn’t affect how we use it at all, so no big deal! I don’t think this would deter me from doing concrete counters again, though! I love the look of them and how durable they are.
Z Counterform made it super easy to have these countertops fit seamlessly into our kitchen makeover. They are beautiful and I love them so much!
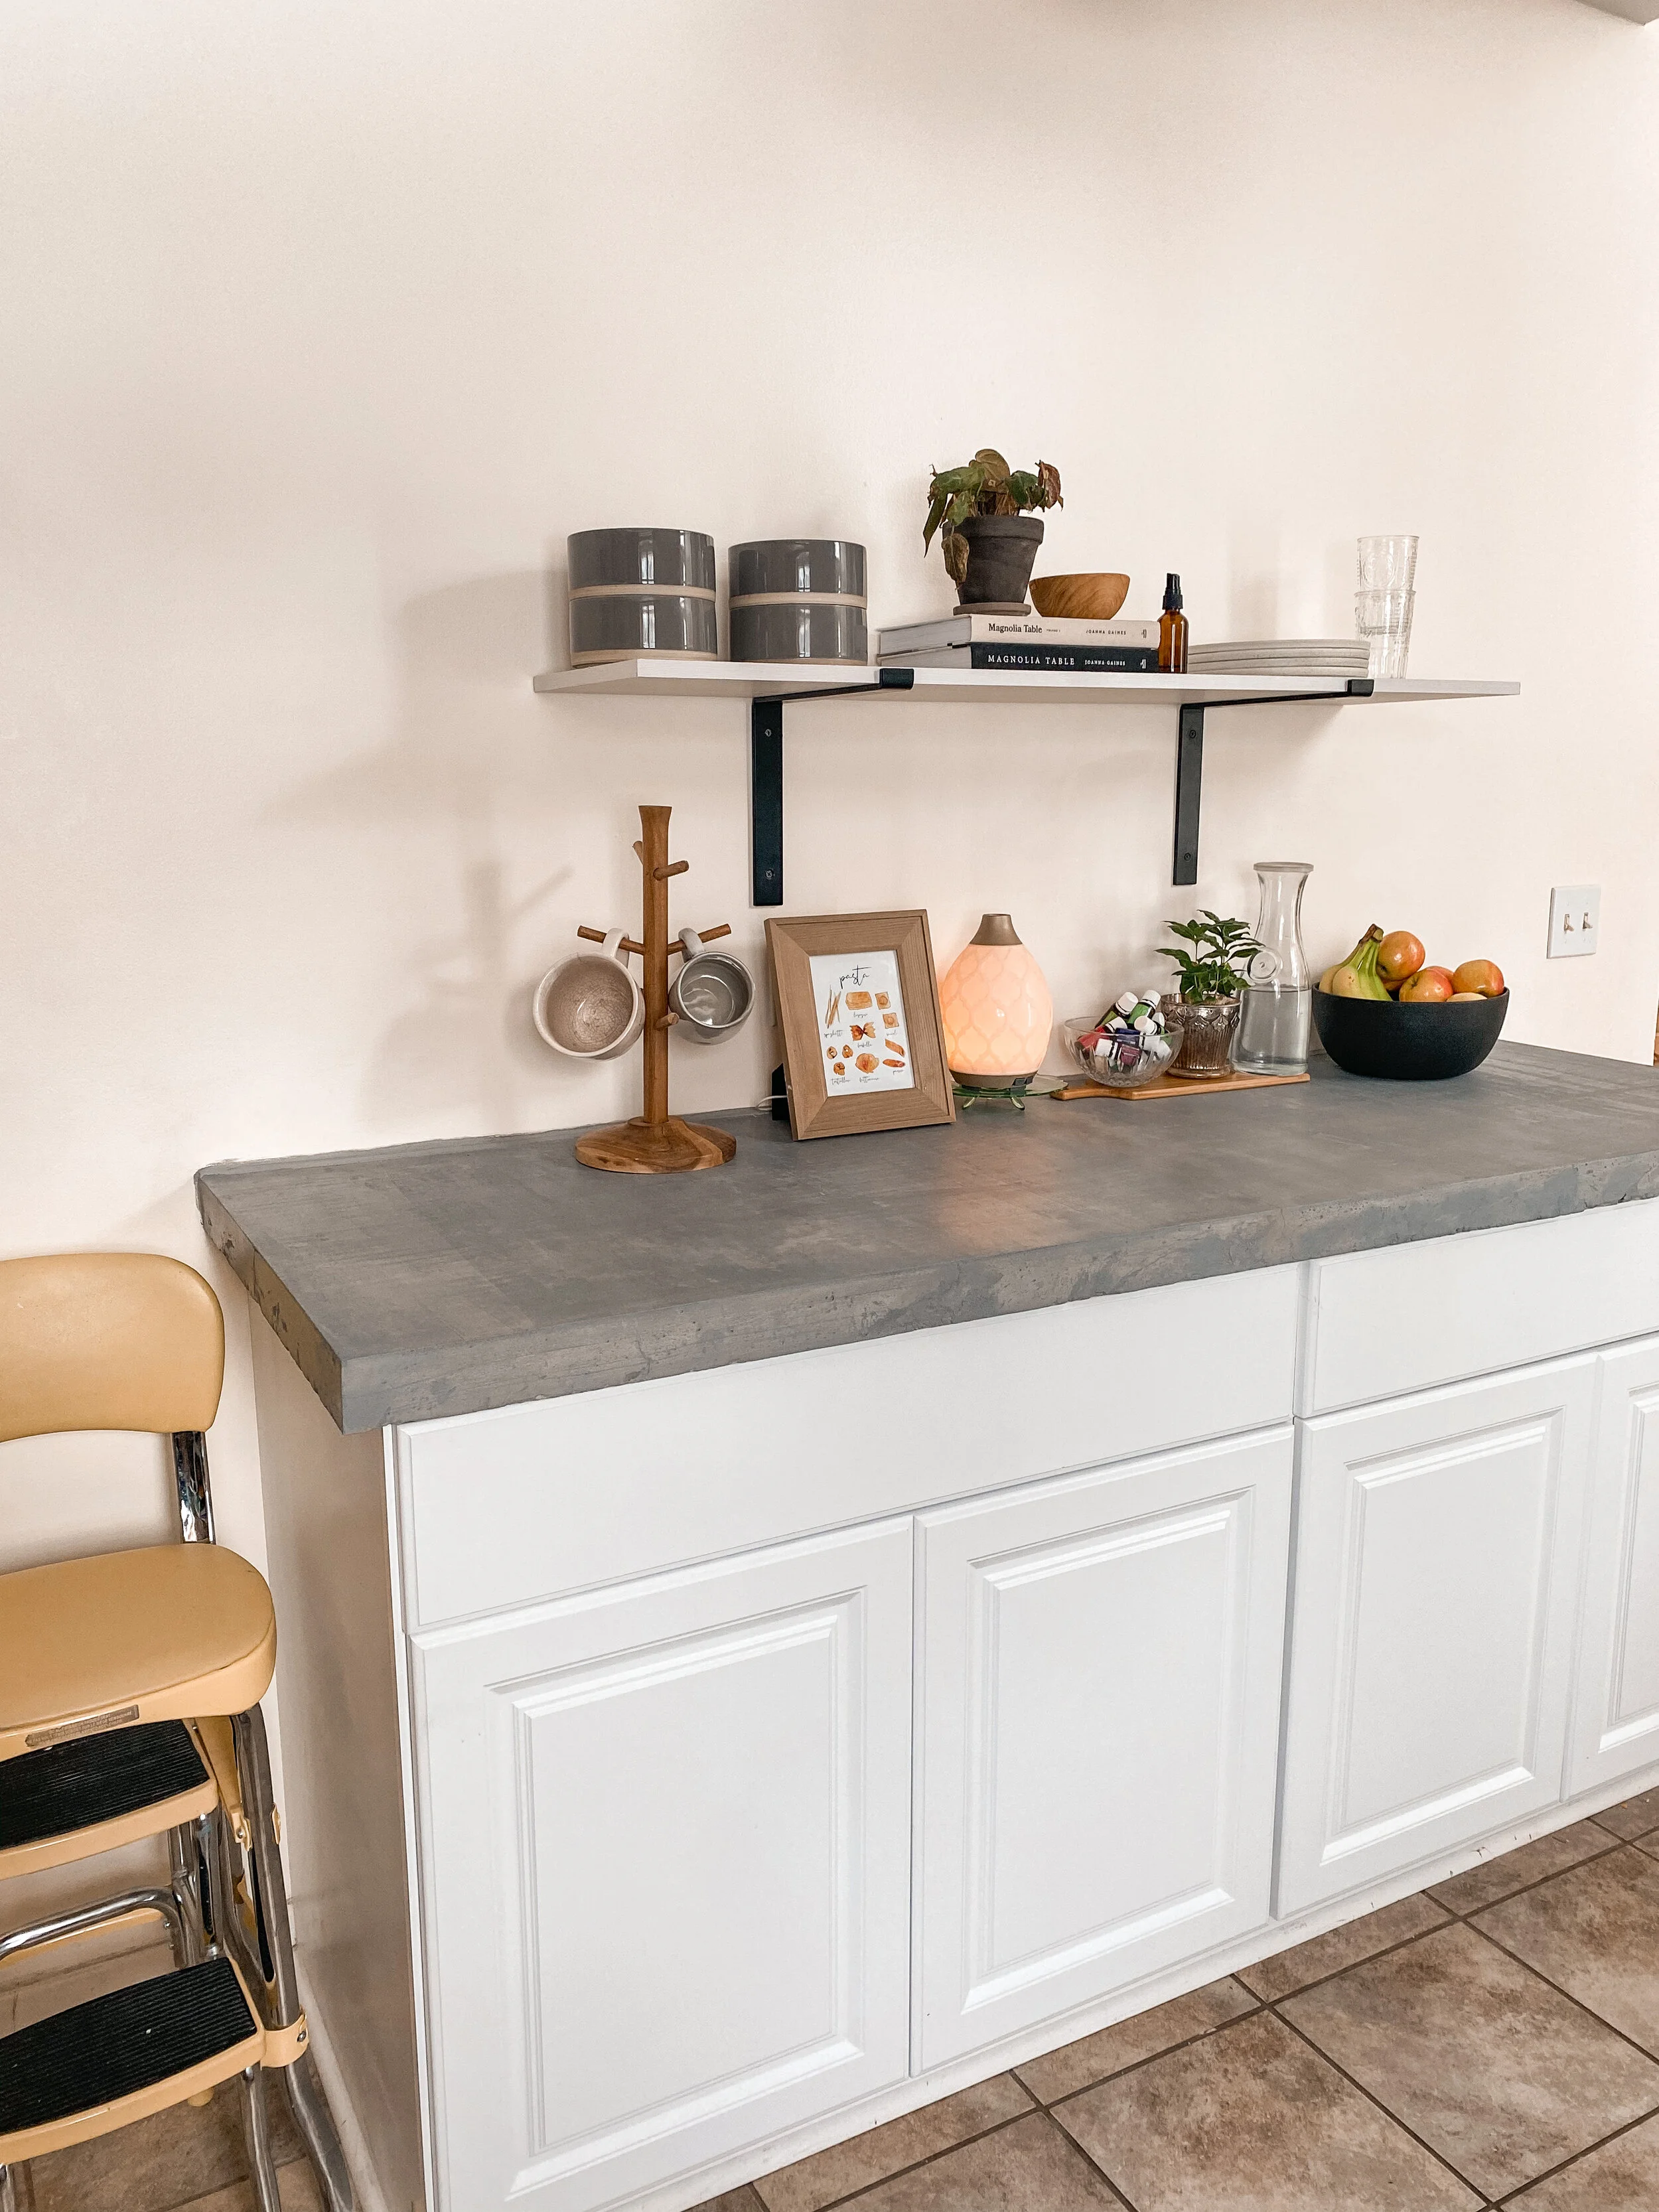
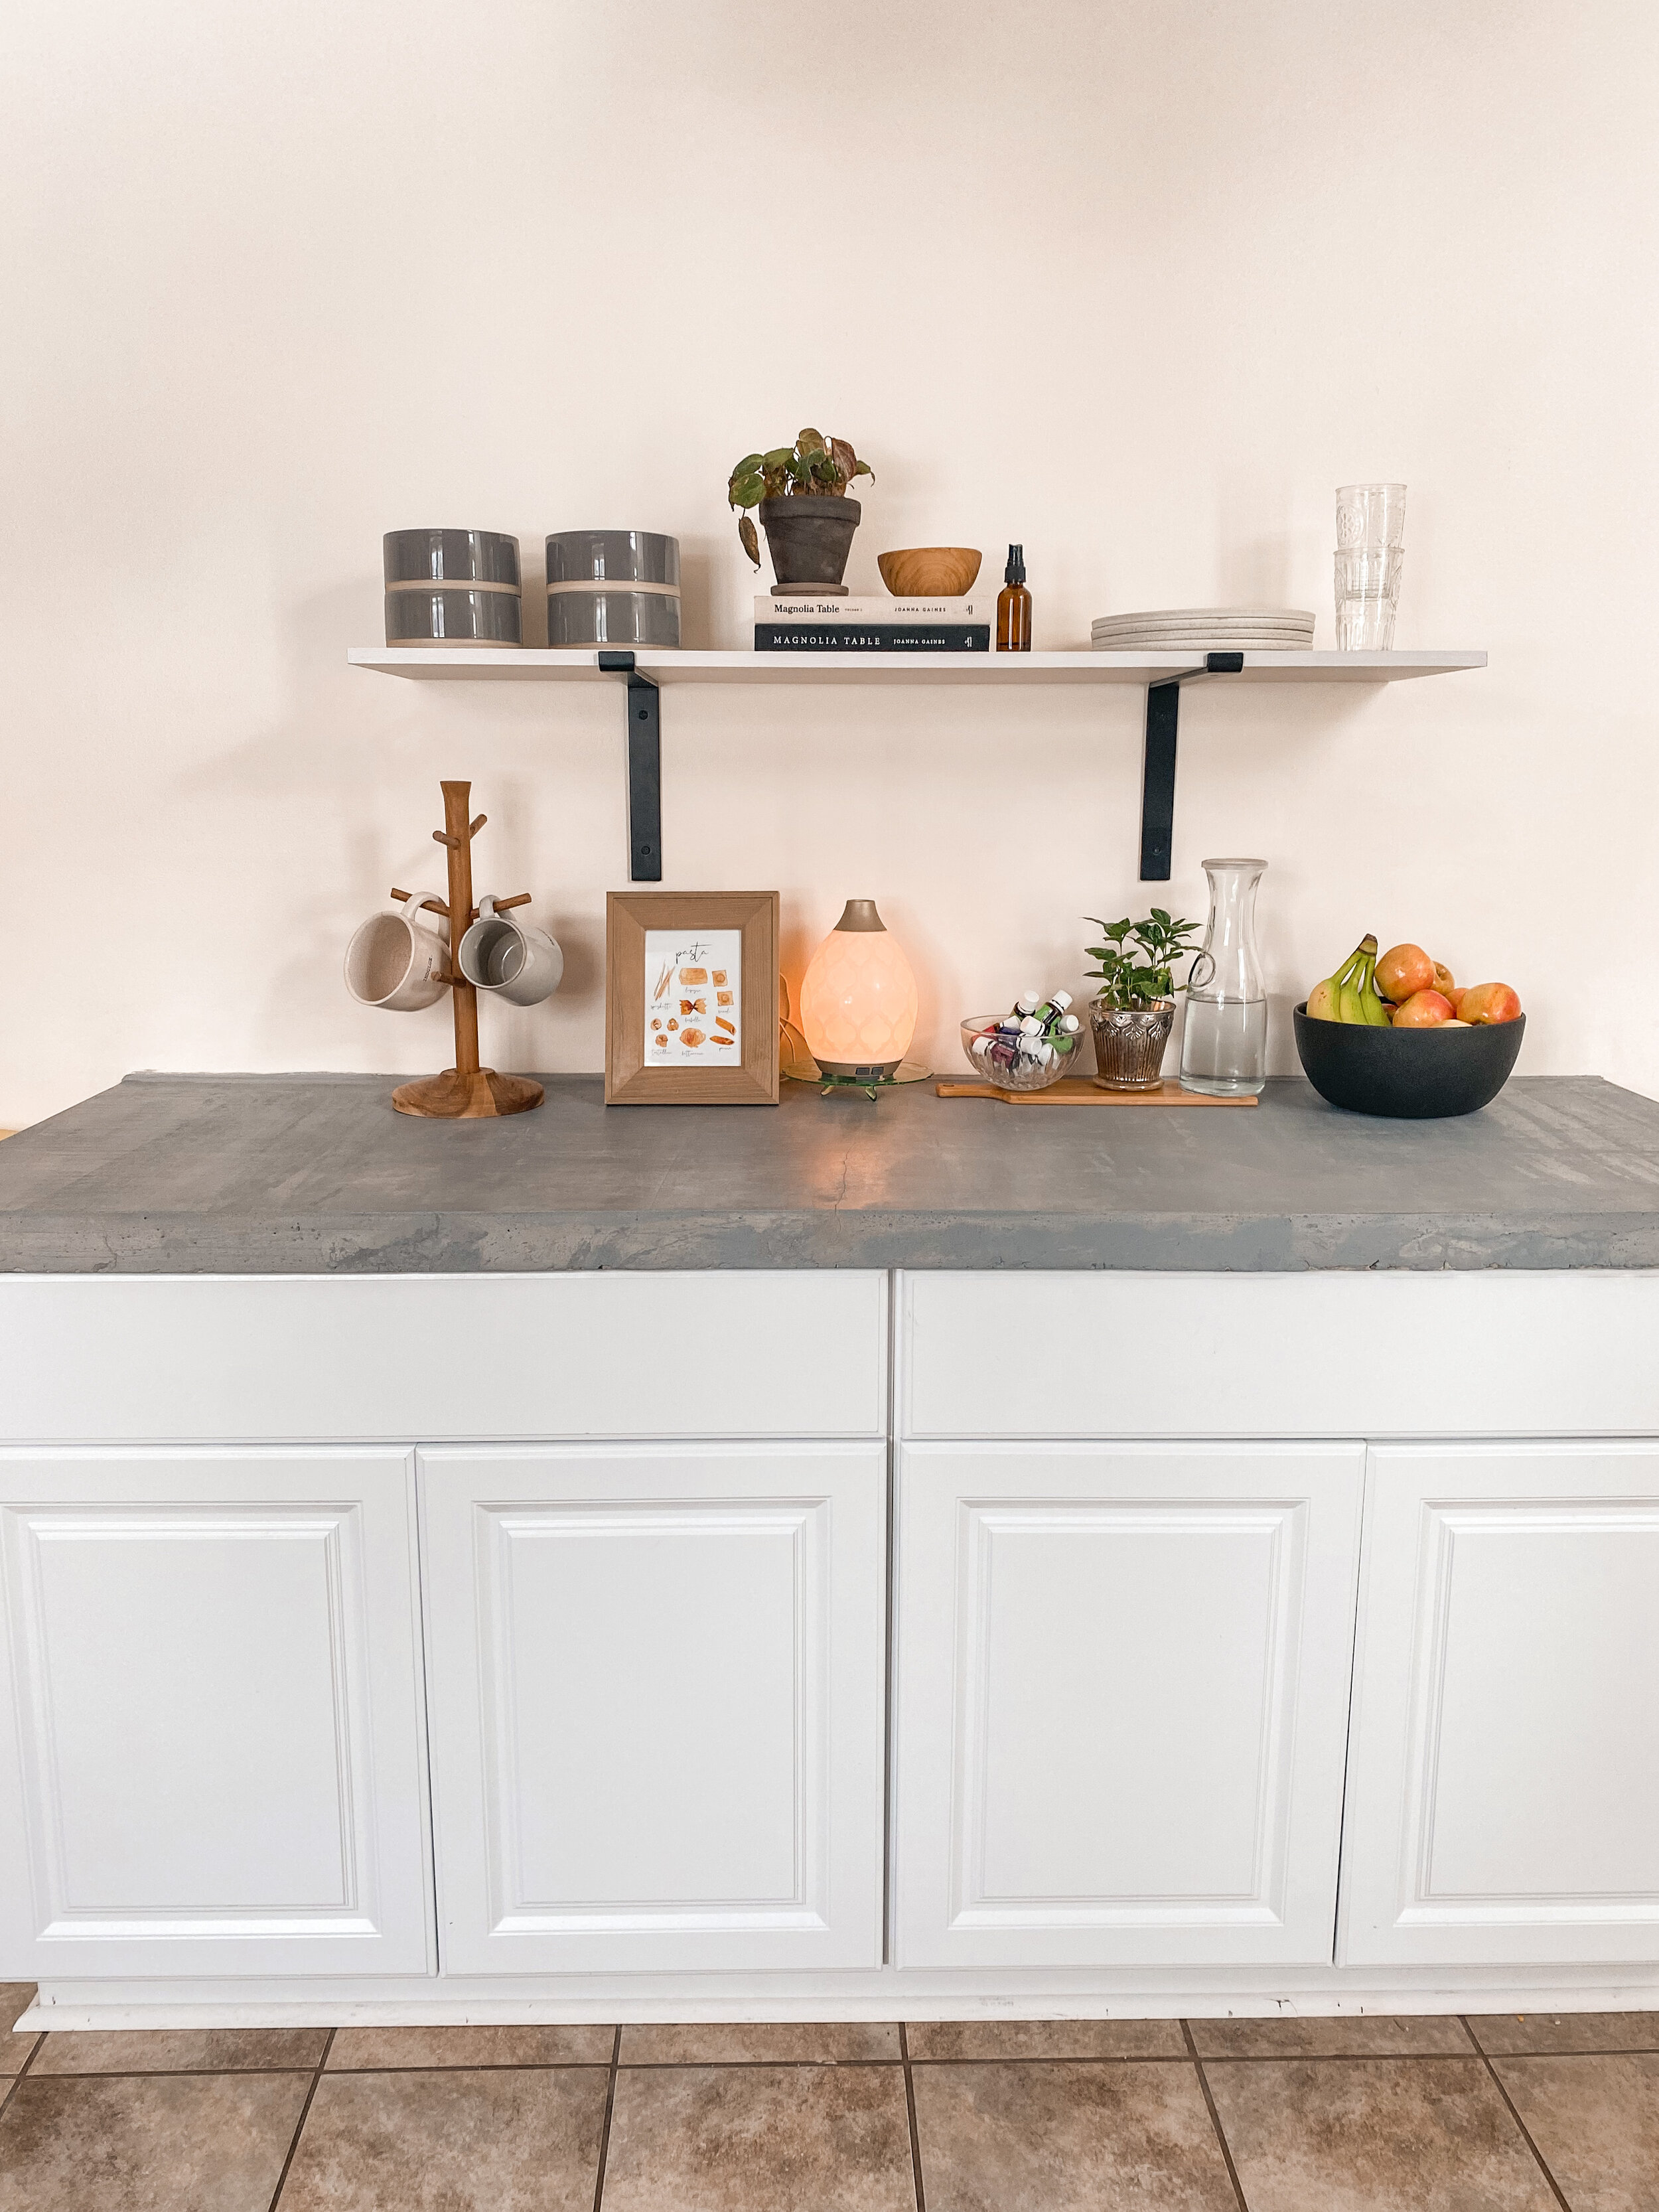
FLOATING SHELF
We also installed a floating shelf above the countertops. We wanted this shelf to be very functional so it’s simple and houses our everyday dishes, bowls, cookbooks, a plant, and some drinking glasses. I will say it was super fun to style this and I love how it turned out! I’m sure I will switch it up over time, but being able to prep food on the counter and then grab our dinner plates to serve our food is a DREAM!

CONCRETE COUNTER STYLING
Since we are prepping a lot of food on these counters, I again wanted to keep the decor simple. I added our mug rack, a bowl with fruit, the diffuser, oils, water for the diffuser, a plant, and a little print to cover up the outlet. Super simple, but so convenient.
I love the little wooden tray that I put the oils, water, and plant on. I feel like it kind of grounds those items so that they aren’t just floating around.
I did a little green depression glass tray under the diffuser to give it some height.
FAQS FOR THE CONCRETE COUNTERS
WHAT DID YOU SEAL THEM WITH?
We actually ended up staining them, which has a built in sealer with it. Z Counterform does make a sealer as well.
COST?
Product cost about $300. Labor cost about $800 (he also moved an outlet for us, added a kickplate, added quarter round, added the Durock, bought the Quikrete concrete mix, stain, and more odds and ends)
WILL THE EDGES STAY RAW?
Yes, but they are smooth to the touch
HOW DO YOU CLEAN THEM?
I use my Thieves cleaner from Young Living and have had no issues, this far
CAN YOU PUT HOT PANS/POTS ON THEM?
Yes, but I always use a trivet as I would on any countertop surface
HOW LONG FROM START TO FINISH?
About a week from start until finish when we could use them. The curing is what takes the longest. They were done within 2 days, but we couldn’t use them until they were fully dry and then stained/sealed
ARE THEY DURABLE/STURDY?
I would say yes! They are solid
DO YOU USE A CUTTING BOARD?
Yes, I do! I use a cutting board on all of our counters so even if you could technically cut right on the counters, I personally would not anyways
CAN YOU MAKE THEM A DIFFERENT COLOR?
Yes, you can! Z Counterform has tints to change the color lighter or darker. We went with the natural concrete color. There is also stain that can change the color as well
My friend, Sarabeth is sharing how she has styled her console table, HERE. Be sure to stop by and see! It’s BEAUTIFUL!!! I love her style so much!
We love these countertops so much! I love the texture and the natural feel they add. The biggest win is all the storage and prep space we now have.
SHOP THE COUNTERTOPS:

Be sure to sign up for our free newsletter to stay up to date with what is going on over here :)
Upon signing up, you will receive 3 gallery wall printables, 5 on the go Mom hacks, and gain access to our FB group! Scroll to the bottom of the page to join! We’d love to have you as part of our community!
Thank you for stopping by the blog!
XO
-LA
SAVE THIS POST FOR LATER, PIN IT NOW:


